Mastering the mendiant is not about following a recipe; it’s about controlling the variables of physics, flavour, and workflow to achieve consistent artistry at scale.
- The perfect mendiant requires precise timing and temperature control, not just creative topping placement.
- Preventing common failures like soggy fruit or a poor ‘snap’ comes from understanding scientific principles like water activity and chocolate crystallography.
Recommendation: Shift your focus from simply decorating to engineering each disc for structural integrity, shelf life, and commercial appeal.
For any artisan chocolatier, the mendiant represents a paradox. It seems deceptively simple: a disc of chocolate, a scattering of fruits and nuts. Yet, creating hundreds of them that are consistently beautiful, with a satisfying snap and a stable shelf life, is a formidable challenge. Many workshops struggle with chocolate setting too fast, toppings looking haphazard, or worse, dried fruits turning soft and ruining the entire batch days later. The frustration is real, and it separates the amateur from the master.
Most advice centres on the obvious: use good chocolate and get creative. But this ignores the core of the craft. We might discuss the merits of different nuts or the visual appeal of goji berries versus cranberries, but we rarely address the underlying mechanics. The true art of the mendiant isn’t just in the decoration; it’s in the production. It’s a dance between aesthetics and efficiency, between tradition and food science.
But what if the key wasn’t simply a better topping combination, but a fundamentally better process? What if we approached the mendiant not as a canvas for random artistry, but as a small-scale engineering project? This guide abandons generic tips to give you, the pragmatic artisan, a workshop-level methodology. We will treat your production space as a laboratory where you control every variable, from the historical symbolism of your toppings to the crystalline structure of your final product.
This article will guide you through a complete masterclass. We will begin with the foundational traditions that give mendiants their soul, then dive deep into the technical execution of timing, placement, and speed. We will analyze commercial viability, solve critical storage and texture problems, and finally, expand our thinking to curating entire collections. Prepare to transform your mendiant production from a hopeful guess into a controlled, repeatable, and profitable art form.
Summary: The Artisan’s Guide to Mendiants: Mastering Ratios, Workflow, and Flavour
- Why Are Mendiants Traditionally Associated with Monastic Orders?
- How to Place Toppings Before the Chocolate Sets Too Hard?
- Pistachio vs. Cranberry: Which Topping Combination Sells Best?
- The Storage Mistake That Makes Dried Fruits Soggy on Chocolate
- How to Pipe 100 Discs in 10 Minutes Using Templates?
- How to Prevent Dried Fruits from Seizing Your Chocolate Mix?
- How to Curate a Chocolate Box That Pleases Every Generation?
- The Chopping Mistake That Ruins the Snap of Your Bar
Why Are Mendiants Traditionally Associated with Monastic Orders?
Before we touch a single disc of chocolate, we must understand its soul. The mendiant is not a modern invention; it is a confection steeped in history and symbolism. Its name, “mendiant,” is French for “beggar,” a direct reference to the four mendicant, or begging, monastic orders of the medieval Catholic Church. This historical connection is the foundation of the classic mendiant and provides a powerful storytelling tool for any artisan.
The traditional four toppings are not random; each one represents an order by the colour of its robes. As a study on their origins notes, the classic combination consists of almonds (white) for the Dominicans, raisins (grey) for the Franciscans, hazelnuts (brown) for the Carmelites, and dried figs (purple) for the Augustinians. This quartet is the DNA of the mendiant. Knowing this history allows you to market a “traditional” or “classic” assortment with authenticity, appealing to customers who appreciate heritage and story.
However, as artisans, we are not merely historians. We are innovators. Understanding the “rule of four” allows us to creatively break it. You can build your own symbolic quartets based on a theme that resonates with your brand or audience. Consider a “Four Seasons” box (e.g., cherry for spring, toasted coconut for summer, pecan for autumn, cranberry for winter) or a “Local Terroir” collection using nuts and fruits specific to your region. The key is to maintain a balance of contrasting colours, textures, and flavours—crunchy, chewy, sweet, and tart—to create a composition that is as deliberate as the original.
How to Place Toppings Before the Chocolate Sets Too Hard?
This is the most time-sensitive, high-pressure step in mendiant production. The moment the tempered chocolate is piped, a clock starts ticking. You are in a race against crystallization. The difference between a beautifully composed disc and a messy, amateurish one is a matter of seconds. The secret is not faster hands, but a superior workflow and an understanding of the chocolate’s “Goldilocks Zone.”
This zone is the brief window after piping when the chocolate has lost its initial liquid sheen but has not yet turned fully matte. It’s firm enough to hold a topping without it sinking, yet soft enough for it to adhere permanently. Working in this window is non-negotiable for a professional finish. To achieve this, you must abandon chaotic decorating and adopt a rigorous “mise en place” assembly line method. Before a single drop of chocolate is melted, all your toppings must be prepped and arranged in small bowls, within easy reach.

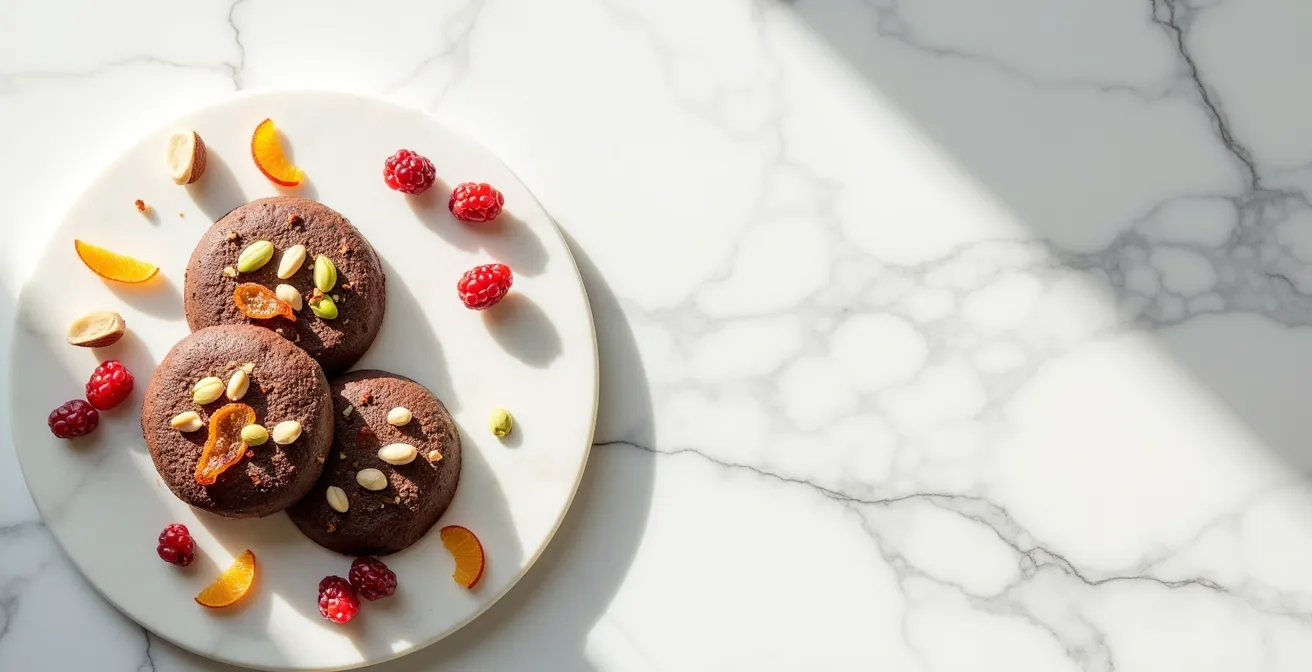
As the illustration shows, the ideal surface has a satin-like texture, not a mirror gloss. To work efficiently, operate in small, controlled batches of no more than six to eight discs at a time. Pipe these discs, then immediately move to placing the toppings with tweezers for precision. Using a consistent amount of chocolate, about one tablespoon per mendiant, ensures they all set at a similar rate, making your workflow predictable. This systematic approach transforms a frantic race into a calm, controlled, and repeatable process.
Your Topping Placement Audit Plan
- Workspace Setup: Are all toppings prepped in bowls and tools (tweezers, parchment) laid out before melting begins?
- Batching Process: Are you piping a manageable number of discs (6-8) at once to avoid some setting before you can top them?
- Timing Observation: Are you visually identifying the “Goldilocks Zone” (satin finish) before placing toppings, or are you rushing?
- Tool Usage: Are you using precision tools like tweezers for small items, or are you relying on clumsy finger placement?
- Consistency Check: Is each disc piped with a consistent volume of chocolate to ensure a uniform setting time across the batch?
Pistachio vs. Cranberry: Which Topping Combination Sells Best?
Once you’ve mastered the technique, the next question is commercial: what sells? While tradition calls for muted browns and purples, the modern consumer is drawn to vibrant colours and compelling flavour contrasts. The combination of green pistachios and red cranberries has become an artisanal staple for a reason: it delivers on multiple sensory and psychological levels.
The primary advantage of the pistachio-cranberry pairing is its high-contrast visual impact, which stands out in a display case. The bright red and green are strongly associated with the Christmas holiday season, a crucial sales period. In fact, major holidays are paramount for the industry, with a report showing that 65% of total chocolate sales occur during Valentine’s Day, Easter, Halloween, and the winter holidays. This makes a seasonally coloured mendiant a powerful commercial tool.
However, sales are not just about looks. The pistachio-cranberry combination offers a sophisticated flavour balance of tart, savoury, and sweet that appeals to a modern palate. This contrasts with the classic mendiant’s simpler sweet-nutty profile. The choice between them is a strategic decision about brand positioning.
This comparative analysis highlights the strategic trade-offs between different mendiant styles. A modern combination offers higher visual impact and premium perception, while the traditional quartet provides a sense of heritage and year-round appeal.
| Factor | Pistachio-Cranberry | Traditional Four |
|---|---|---|
| Visual Impact | High contrast red-green | Muted browns |
| Seasonal Association | Christmas colors | Year-round appeal |
| Flavor Balance | Tart-savory-sweet | Sweet-nutty |
| Premium Perception | Modern artisanal | Classic heritage |
The Storage Mistake That Makes Dried Fruits Soggy on Chocolate
There is nothing more disappointing than creating a perfect batch of mendiants only to discover a week later that the dried fruits have turned soft and the chocolate has a dull, tacky surface. This is not a sign of poor-quality chocolate; it is a failure to control water activity. This single scientific principle is the most common reason for mendiant failure post-production.
Dried fruits are not truly “dry.” They contain residual moisture, and nature always seeks equilibrium. When a moist fruit sits on dry, fatty chocolate, the water molecules will migrate from the fruit into the chocolate. This process, known as moisture migration, makes the fruit soggy, can cause the sugar in the chocolate to bloom, and ruins the texture. The cardinal rule of mendiant storage is to fight this migration.
The most common mistake is refrigeration. The cold, humid environment of a refrigerator is a catalyst for condensation, which accelerates moisture migration and causes sugar bloom. Mendiants must be stored at a cool, stable room temperature (ideally 18-20°C or 64-68°F) in a truly airtight container. For extra protection, especially in humid climates, adding food-safe silica gel packets to the container is a professional technique that absorbs ambient moisture. Furthermore, using freeze-dried fruits, which have extremely low water activity, is a guaranteed way to prevent the problem from the start.
How to Pipe 100 Discs in 10 Minutes Using Templates?
Moving from a home kitchen to an artisanal production environment requires a radical shift in mindset. The goal is no longer just to make a few beautiful mendiants, but to produce hundreds of them consistently and efficiently. Achieving a rate of 100 discs in 10 minutes is not about frantic speed; it’s about a flawless workflow and eliminating every wasted motion.
The first key is maintaining the perfect working temperature for your chocolate. For dark chocolate, this is a narrow window. According to experts at Valrhona, you must hold your tempered dark chocolate at a working temperature of 86-90°F (30-32°C). If it’s too hot, it will be too fluid and spread too thin; too cold, and it will be too thick to pipe cleanly. Using a dedicated chocolate warmer is essential for this level of control.
The second key is to separate tasks. Do not pipe one disc and then decorate it. You must adopt an assembly line process. The most efficient method involves using a template. Create a guide with 2-inch circles spaced at least 1 inch apart and place it under your parchment paper. Transfer your tempered chocolate to a piping bag (or a sturdy resealable bag with the corner snipped) and pipe all 100 discs in one continuous, fluid pass. Once all discs are piped, switch tasks and apply toppings to all of them. This task-batching approach dramatically reduces mental and physical friction, turning a complex process into two simple, repetitive motions.
How to Prevent Dried Fruits from Seizing Your Chocolate Mix?
While toppings are the standard for mendiants, some artisans experiment with incorporating chopped dried fruits directly into the chocolate before piping. This is an advanced and risky technique that often ends in disaster: a seized, grainy, and unusable mass of chocolate. This happens for one reason: water. Chocolate and water are mortal enemies, and even the small amount of moisture in dried fruit is enough to cause seizing.
Seizing occurs when water comes into contact with melted chocolate. The sugar particles in the chocolate absorb the water and immediately clump together, turning the silky fluid into a thick, pasty sludge. To avoid this, you must have an obsessive focus on moisture content. Not all dried fruits are created equal. Freeze-dried berries, with a moisture content of only 2-3%, are generally safe to mix in. However, standard dried fruits like cranberries or dates are far riskier.
As a master chocolatier, your best defense is knowledge and control. You must know the moisture risk of your ingredients and act accordingly.
| Fruit Type | Moisture % | Risk Level | Recommended Use |
|---|---|---|---|
| Freeze-dried berries | 2-3% | Very Low | Safe to mix in |
| Dried cranberries | 15-18% | Medium | Topping only |
| Dates/Prunes | 20-30% | High | Avoid or pre-treat |
| Candied ginger | 10-15% | Medium | Surface dry first |
Beyond fruit, temperature control is also a factor in maintaining chocolate stability. As the Professional Pastry Guidelines from the “Handle the Heat Tempering Guide” state, you must be careful not to overheat your chocolate, which can make it more susceptible to seizing and other issues:
Never heat above 120°F for bittersweet or semisweet chocolate.
– Professional Pastry Guidelines, Handle the Heat Tempering Guide
For any fruit with medium to high moisture, the rule is simple: keep it on top. Do not mix it in. If you must incorporate a riskier fruit, you need to pre-treat it by lightly toasting it to dehydrate the surface. But the safest, most professional approach is to use fruit as a topping, preserving the structural integrity of your perfectly tempered chocolate.
How to Curate a Chocolate Box That Pleases Every Generation?
Mendiants are not just standalone items; they are star players in a larger product line. A well-curated chocolate box is one of the most profitable items in a chocolatier’s arsenal, but creating one that appeals to a diverse family or group is an art. The key is to move beyond your personal taste and think like a strategist, catering to the distinct palates of different generations.
The goal is to create a journey of flavours within the box, ensuring there is something to delight everyone, from a traditionalist grandfather to a trend-seeking granddaughter. This is where the “4-Quadrant Curation Method” comes into play. You design the box by intentionally including a piece for each major demographic profile:
- Quadrant 1: The Classic. This is for the Boomer generation. A dark chocolate mendiant with a simple, high-quality almond or hazelnut. It’s timeless, elegant, and reliable.
- Quadrant 2: The Crowd-Pleaser. This targets Gen X nostalgia. Think milk chocolate with a comforting combination like cranberry and pecan. It’s familiar but feels more special than a standard candy bar.
- Quadrant 3: The Modernist. This is for Millennials, who value artisanal and unexpected pairings. A white chocolate mendiant with matcha powder and black sesame seeds, for example, speaks to this desire for novelty.
- Quadrant 4: The Wildcard. This is for the adventurous Gen Z palate. A dark chocolate disc with chili-dusted mango or a sprinkle of sea salt and pink peppercorns provides the bold, intense flavour experience they often seek.
This approach works because it acknowledges that chocolate is a deeply personal and emotional purchase. A recent survey confirmed that an overwhelming 94% of consumers purchase chocolate for personal enjoyment. By offering this curated variety, you are not just selling chocolates; you are selling an experience of shared discovery and satisfying every individual’s craving within a single purchase.
Key takeaways
- Mastery comes from controlling variables, not just being creative.
- Understand the “Goldilocks Zone” of your chocolate for perfect timing.
- Moisture is the enemy: use airtight storage and choose toppings wisely.
- Streamline your workflow with templates and task-batching for efficiency.
- Curate your offerings strategically to appeal to different generational tastes.
The Chopping Mistake That Ruins the Snap of Your Bar
We end where the customer begins: the sound. The sharp, crisp “snap” of high-quality chocolate is its auditory signature. It’s an unmistakable mark of a well-tempered, well-made product. While this is most obvious in a solid bar, the principle applies to mendiants as well. A mendiant should break cleanly, not bend or crumble. A common mistake that ruins this critical characteristic is the improper size and distribution of inclusions like nuts.
The snap is a direct result of the chocolate’s internal crystal structure. Proper tempering encourages the formation of Beta V crystals, which are small, stable, and tightly packed. This dense structure is what gives chocolate its gloss, smooth mouthfeel, and, most importantly, its clean break. Anything that disrupts this tightly knit structure will create a point of weakness.
The mistake many artisans make, especially when creating chocolate bark or heavily loaded mendiants, is using toppings that are too large. A whole almond or a large piece of dried fruit acts like a boulder in a solid wall of concrete. When pressure is applied, the fracture will travel along the path of least resistance, which is around this large inclusion. This prevents a clean break and results in a crumbly, unsatisfying texture. To preserve the snap, all inclusions should be chopped to a size that is proportionate to the thickness of the chocolate. For a thin mendiant, this means using slivered nuts, small seeds, or finely chopped fruit, rather than whole pieces.
This obsession with detail, from the historical symbolism to the crystalline structure, is what defines the artisan. Apply this mindset of precision and artistry to every piece you create, transforming your workshop from a simple kitchen into a celebrated laboratory of flavour and texture.