
The magic of salted caramel isn’t just taste contrast; it’s a neurochemical trick where salt suppresses bitterness and amplifies your brain’s perception of sugar.
- Sodium ions in salt prime the SGLT1 receptors on your tongue, making them more efficient at detecting glucose.
- Salt chemically masks the bitter notes that develop during caramelization, allowing the purer, sweeter flavors to shine through.
Recommendation: To leverage this effect, focus less on the amount of salt and more on its physical form and timing of integration, as this dictates the flavor release and final sensory experience.
The rise of salted caramel from a regional French delicacy to a global phenomenon seems almost paradoxical. Why would adding a savory element to an intensely sweet confection make it not just more balanced, but perceptibly sweeter and more complex? Many will say it’s about “contrast” or “balance,” but these explanations barely scratch the surface. They fail to explain the profound chemical and neurological alchemy that occurs when salt meets caramelized sugar. The common understanding misses the fact that salt isn’t just a counterpoint; it’s an active flavour enhancer.
The real answer lies deep within the intersection of thermal chemistry and neurogastronomy. The process of making caramel is a controlled dance on the edge of burning, creating not just sweetness but also subtle bitter compounds. At the same time, our tongues are wired with specific biological gateways for taste. The secret to perfect salted caramel is not simply throwing in a pinch of salt, but understanding how sodium ions interact with these bitter notes and, more importantly, how they prime our taste receptors to receive sugar.
This isn’t about simply following a recipe. It’s about mastering the science behind it. In this deep dive, we will deconstruct the entire process, from the molecular structure of salt flakes to the precise thermal stages of sugar. We will explore how to avoid common pitfalls like crystallization and how to manipulate temperature to achieve textures ranging from a flowing sauce to a chewy candy. By understanding the ‘why’ behind each step, you’ll move from being a cook to being a true architect of flavor, capable of crafting a caramel that is not just sweet, but a multi-layered sensory experience.
This guide breaks down the science and technique behind perfect caramel, exploring each critical stage of the process. Discover the principles that govern everything from texture to flavor balance in the detailed sections below.
Summary: The Science and Art of Perfect Caramel
- Why Sea Salt Flakes Work Better Than Table Salt in Caramel?
- Dry Caramel vs. Wet Method: Which Is Less Prone to Crystallizing?
- Butter vs. Cream First: In What Order to Add Fats safely?
- The Stirring Mistake That Turns Smooth Caramel Sandy
- How to Modify the Recipe for Sauce vs. Chewy Candy?
- How to Make Crunchy Hazelnut Praline Paste Without Burning the Sugar?
- Why High-Quality Forastero Is Essential for Structured Ganaches?
- How to Control Caramel Stages from Amber to Dark for Praline?
Why Sea Salt Flakes Work Better Than Table Salt in Caramel?
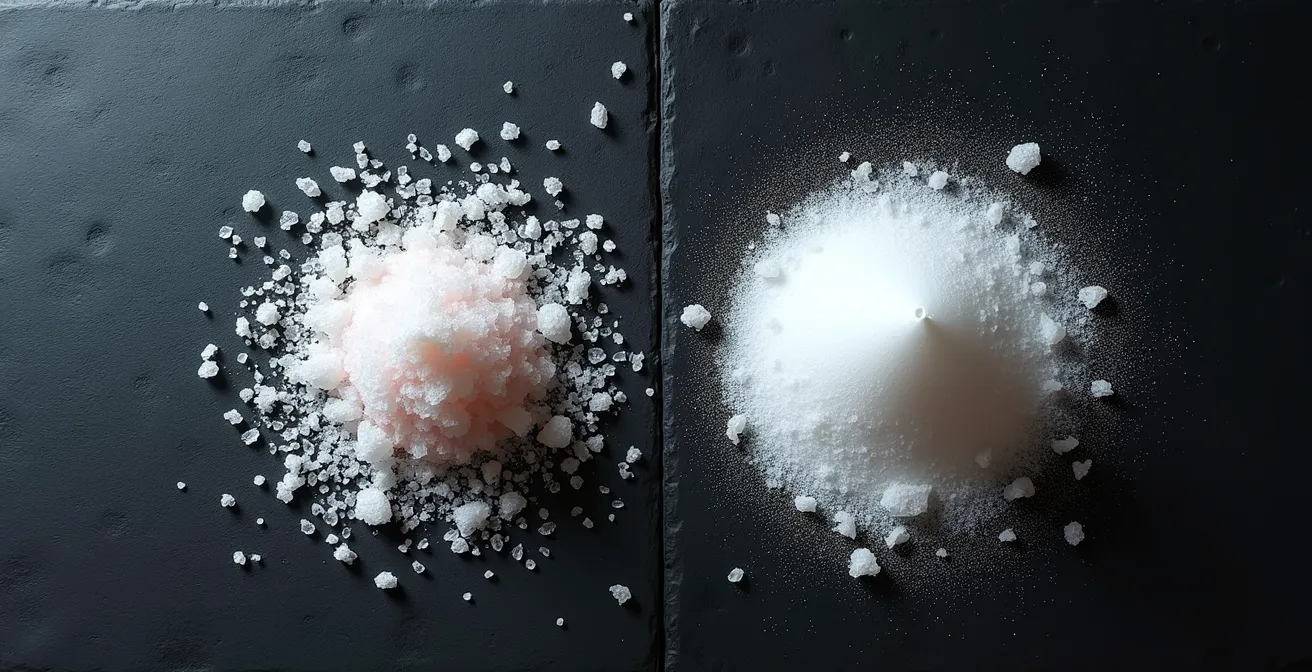
The choice of salt in caramel is far more than a matter of preference; it’s a decision that directly impacts flavor perception through physical and chemical properties. While table salt can provide saltiness, it falls short in delivering the dynamic experience that sea salt flakes offer. The key difference lies in structure and dissolution rate. Table salt consists of small, dense cubic crystals that dissolve almost instantly, delivering a sharp, one-dimensional wave of saltiness. This can easily overpower the delicate notes of the caramel.
In contrast, sea salt flakes, especially fleur de sel, have a larger, more irregular, and brittle pyramid-like structure. This structural difference is critical. When sprinkled on caramel, these flakes don’t dissolve immediately. Instead, they create tiny pockets of intense salinity that burst on the tongue as they dissolve, creating a dynamic contrast with the smooth sweetness of the caramel. This “textural dissolution” provides a layered flavor experience rather than a homogenous one. The flakes provide a satisfying textural crunch before melting away.
This visual distinction highlights the core of the issue. The large surface area of the flakes allows for a slower, more controlled release of flavor, enhancing the caramel’s complexity.
Furthermore, the science of dissolution confirms this. Studies show that the physical shape and mineral content, such as magnesium, significantly affect how quickly salt dissolves in saliva. An analysis on the dissolution of sea salt found that factors beyond just sodium content influence solubility. This slower, more complex dissolution profile is precisely what allows the bitterness-suppressing effect of salt to work in harmony with the sweetness, rather than just clashing with it. The result is a more nuanced and engaging taste.
Dry Caramel vs. Wet Method: Which Is Less Prone to Crystallizing?
One of the greatest fears in caramel making is crystallization—the dreaded moment when your smooth, amber liquid turns into a sandy, granular mess. This happens when the sucrose molecules, which have been broken down by heat, decide to regroup into their original crystal structure. The method you choose to melt the sugar, dry or wet, has a significant impact on this risk. The dry method involves melting sugar directly in a pan. It’s faster and produces a more intense, slightly bitter flavor, but it is highly prone to uneven heating and burning, which can trigger crystallization.
The wet method, where sugar is dissolved in water before heating, is far more forgiving and less prone to crystallization. The water helps the sugar heat evenly and prevents it from burning too quickly. However, the most effective weapon against crystallization isn’t just water, but the introduction of an “interfering agent.” This is where a different type of sugar, like glucose syrup or corn syrup, becomes essential. These are invert sugars, meaning they consist of glucose and fructose molecules instead of sucrose.
As experts from Iowa State University’s Extension explain, these interfering agents are key to a smooth final product:
The most common precaution to prevent crystallization in recipes for caramel is to add an invert sugar to make it hard for the sucrose to congregate. Corn syrup is an invert sugar and acts as an ‘interfering agent’ in candy or candy-like recipes. It contains long chains of glucose molecules that tend to keep the sucrose molecules in the candy syrup from crystallizing.
– Iowa State University Extension, AnswerLine Food Science Blog
These long glucose chains physically get in the way, preventing the sucrose molecules from aligning and forming crystals. In fact, research on candy making confirms the powerful effect of this technique. A 2024 study on candy crystallization demonstrates that adding glucose syrup can reduce crystallization by up to 87%. For this reason, the wet method combined with an interfering agent is the most reliable path to a perfectly smooth caramel.
Butter vs. Cream First: In What Order to Add Fats safely?
Once your sugar has reached the desired amber hue, the next critical—and potentially dangerous—stage is adding the fats. This is where a smooth syrup can turn into a volcanic, sputtering hazard if not handled correctly. The question of whether to add butter or cream first is a matter of both safety and chemistry. The primary danger comes from the drastic temperature difference between the molten sugar (around 350°F / 177°C) and the water content in the butter and cream. Adding a cold liquid to hot sugar will cause the water to flash into steam instantly, leading to violent bubbling and splattering.
For this reason, the universally accepted professional technique is to add the butter first, off the heat. Butter is an emulsion of about 80% fat and 20% water and milk solids. When added to the hot sugar, the fat helps to cool the caramel down slightly and more gently than the high water content of cream would. Crucially, both the butter and the cream should be at room temperature to minimize the temperature shock. After the butter is incorporated, the cream can be added slowly and steadily, which allows for a more controlled reaction.
The addition of these fats does more than just add flavor and richness. According to temperature precision data from ThermoWorks, reaching the firm-ball stage at 245°-249°F (118-121°C) is key for chewy caramels, and at this point, the fats and proteins from butter and cream also act as further interfering agents, helping to prevent crystallization and ensure a smooth, stable final product with the correct sugar concentration of 87-91%.
Action Plan: Safely Incorporating Fats into Caramel
- Heat sugar to a deep amber color, reaching your target temperature for the desired consistency (e.g., 235-240°F for sauce).
- Remove the pan from the heat source *before* adding any fat to prevent dangerous splattering.
- Add room temperature butter, cut into several small pieces, and stir constantly as the mixture bubbles vigorously.
- Once the butter is mostly incorporated, slowly and carefully pour in room temperature heavy cream while maintaining continuous stirring.
- Return the pan to low heat only if necessary to fully dissolve any hardened bits, stirring until completely smooth.
The Stirring Mistake That Turns Smooth Caramel Sandy
It feels counterintuitive. In most cooking, stirring is a good thing—it promotes even cooking and prevents burning. But in the initial stages of caramel making, specifically when using the wet method, unnecessary stirring is the primary culprit behind a grainy, sandy texture. This comes back to the science of sugar crystallization. When you dissolve sugar in water, you are creating a supersaturated solution. The goal is to heat this solution so the sucrose molecules break down without giving them a chance to reform into crystals.
Stirring the sugar syrup before it has fully dissolved and started to boil introduces agitation. This can scrape sugar crystals from the sides of the pot back into the solution, or the spoon itself can introduce impurities. These undissolved crystals act as “seeds” or nucleation sites, creating a chain reaction where other sugar molecules begin to attach themselves, rapidly turning your smooth liquid into a granular failure. The best practice is to gently swirl the pan if you need to encourage even heating, but avoid inserting a spoon at all costs until the sugar has completely dissolved and the syrup is boiling steadily.
Once the caramel has reached its desired color and you are adding the butter and cream, stirring becomes essential again to emulsify the fats and cool the mixture. But what if you made a mistake and your caramel has already started to crystallize? All is not lost. The rescue technique involves gently reheating the caramel with a small amount of hot water to dissolve the unwanted crystals, effectively giving you a second chance.
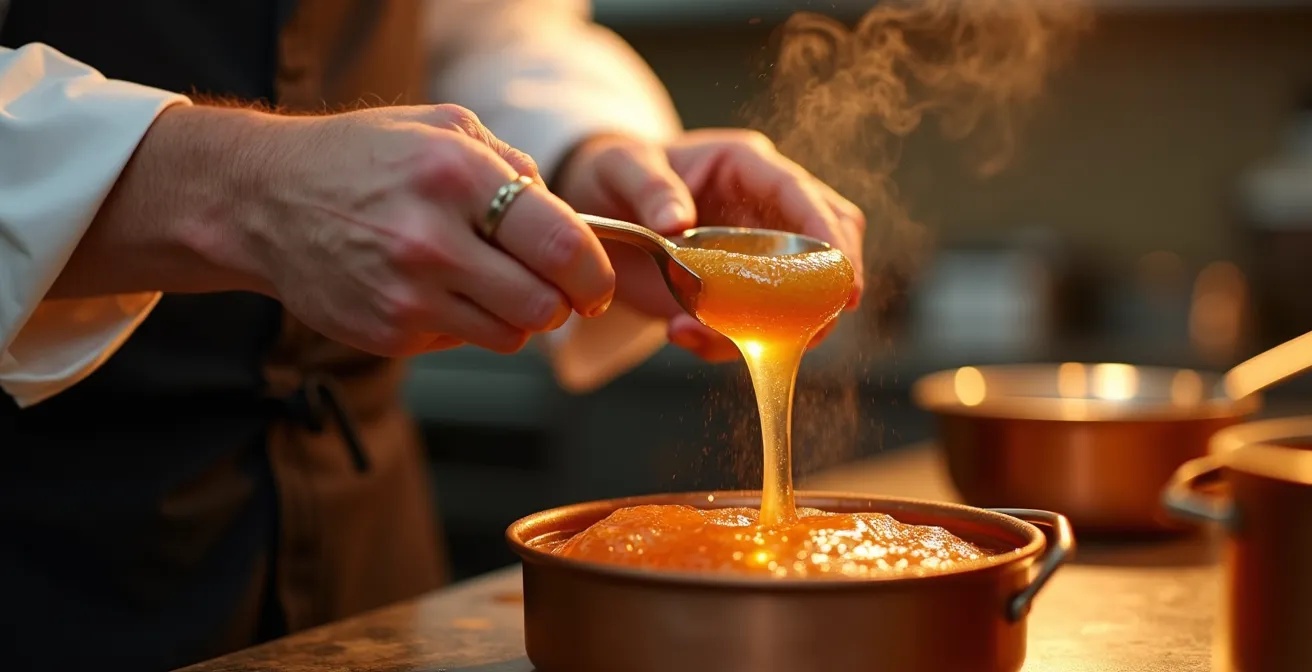
This image captures the critical rescue moment, where controlled re-hydration can save a crystallized batch. By understanding that early stirring promotes crystal formation, you can avoid this problem altogether. Let the heat and gentle swirling do the work, and reserve your whisk for the final emulsification stage. This patience is a hallmark of precise thermal chemistry control.
How to Modify the Recipe for Sauce vs. Chewy Candy?
The transformation of caramel from a liquid sauce to a firm, chewy candy is not determined by the ingredients themselves, but by one single variable: temperature. As you boil a sugar syrup, water evaporates, and the concentration of sugar increases. The final temperature you cook the caramel to is a direct indicator of its sugar concentration, which in turn dictates its final texture when cooled. This is the entire science behind candy making, codified in what are known as the “candy stages.”
A candy thermometer is indispensable for this task, as even a few degrees can make the difference between a gooey sauce and a hard lozenge. For a pourable salted caramel sauce, you would typically cook the sugar to the “soft ball” stage. At this point, the sugar concentration is lower, resulting in a softer set. For classic, chewy caramel candies that you can wrap individually, you need to continue cooking to the “firm ball” stage, where a higher sugar concentration yields a tougher, chewier texture.
Understanding these stages allows you to take a single base recipe and adapt it for multiple applications. The table below, based on established candy-making science, provides a clear roadmap for how temperature controls texture.
A comprehensive analysis of candy science provides a clear guide to these transformations. The following table, adapted from data on candy temperature stages, is your key to mastering texture.
| Temperature Range | Stage Name | Sugar Concentration | Final Texture | Best Use |
|---|---|---|---|---|
| 235-240°F (113-116°C) | Soft Ball | 85% | Chewy, pliable | Caramel sauce |
| 245-249°F (118-121°C) | Firm Ball | 87-91% | Firm, gooey | Chewy caramels |
| 250-266°F (121-130°C) | Hard Ball | 92-95% | Hard, moldable | Caramel candies |
| 270-290°F (132-143°C) | Soft Crack | 95-99% | Bendable, sticky | Taffy, butterscotch |
How to Make Crunchy Hazelnut Praline Paste Without Burning the Sugar?
Creating a crunchy hazelnut praline involves embedding toasted nuts in a brittle sheet of hard caramel, which is then shattered and ground. The primary challenge here is achieving a deep, nutty caramel flavor without crossing the fine line into burnt bitterness. Unlike soft caramels, praline requires a much higher temperature to achieve its characteristic “hard crack” texture, which makes the margin for error incredibly slim. The key is to understand the caramelization threshold.
Sugar caramelization begins around 320°F (160°C). This is the point where sucrose molecules start to break down and reform into hundreds of new aromatic compounds. As the temperature rises, the flavor develops from sweet and buttery to nutty and complex. However, beyond 338°F (170°C), more and more bitter compounds are created, and the caramel can quickly become acrid. The secret to perfect praline is to push the caramel right to this upper limit to get maximum flavor complexity, and then stop the cooking process instantly.
To do this successfully, professionals follow a precise workflow that separates the nut toasting from the caramel cooking:
- Toast the nuts separately: Toasting hazelnuts (or other nuts) in an oven at around 350°F (175°C) develops their flavor through the Maillard reaction, a separate process from caramelization. Using warm, pre-toasted nuts is crucial as adding cold nuts to hot caramel can cause the sugar to seize.
- Use the dry method: For praline, the dry method of melting sugar is often preferred as it caramelizes faster and develops a more robust flavor.
- Monitor temperature relentlessly: Use a candy thermometer and aim for a target of 338°F (170°C).
- Arrest the cooking: The moment the target temperature is reached, or the desired deep amber color appears, add the warm nuts to coat them quickly. Immediately pour the mixture onto a cold surface like a marble slab or a silicone mat. This rapidly draws the heat out of the caramel, preventing it from overcooking due to residual heat.
This controlled process ensures a praline that is deeply flavorful and brittle, not bitter and burnt.
Why High-Quality Forastero Is Essential for Structured Ganaches?
While praline showcases caramel’s brittle side, ganache explores its interaction with fat in a creamy emulsion. When incorporating caramel into a chocolate ganache, the choice of chocolate is not merely about flavor; it’s a critical structural decision. Forastero cocoa, often considered the workhorse of the chocolate world, is uniquely suited for this task due to its robust chemical and physical properties. A ganache is a delicate emulsion of fat (from cocoa butter and cream) and water (from cream). For this emulsion to be stable, especially when accommodating the extra sugar and moisture of a caramel component, it needs a strong foundation.
High-quality Forastero chocolate typically possesses a higher fat content in its cocoa butter and a specific fat crystal structure that provides excellent stability. This robust fat network is essential for creating the framework of the ganache, giving it the body and viscosity needed to remain smooth and not separate or “break.” Cheaper chocolates or those with less cocoa butter (like Criollo, which is prized for aroma, not structure) may result in a ganache that is too soft, oily, or unstable over time.
Furthermore, Forastero’s flavor profile is a perfect partner for caramel. It is known for its classic, straightforward, and strong “chocolatey” notes, with a foundation of earthy bitterness. This inherent bitterness is crucial for flavor layering. It provides a deep, resonant bass note that cuts through the sweetness of both the chocolate and the added caramel, preventing the final product from becoming cloyingly sweet. The structure comes from its fats, but the balance comes from its fundamental flavor profile. Using a high-quality Forastero isn’t just a choice—it’s a technical requirement for a well-structured, balanced, and stable caramel ganache.
Key Takeaways
- Salt’s primary role is not just to add saltiness, but to suppress bitter notes in caramel, which makes the sweetness appear more prominent.
- The physical form of salt (flakes vs. fine grains) dictates the speed of flavor release and creates a more complex, multi-layered sensory experience.
- Preventing sugar crystallization is paramount and is best achieved by using the “wet method” combined with an interfering agent like corn or glucose syrup.
How to Control Caramel Stages from Amber to Dark for Praline?
The final flavor profile of a caramel, especially for a praline where flavor intensity is paramount, is dictated by how far you are willing to push the caramelization process. This is a spectrum that ranges from a light, sweet blonde to a deep, complex, and borderline-bitter dark amber. Controlling the journey along this spectrum is an art of heat management. As the sugar syrup boils and water evaporates, the temperature rises, and each new temperature threshold unlocks a different set of flavor compounds.
The initial stage, around 320°F (160°C), produces a light amber caramel with sweet, buttery, and vanilla-like notes. This is ideal for delicate sauces or when you want the flavor of other ingredients (like nuts in a praline) to be the star. As the temperature climbs towards 345°F (174°C), the caramel darkens to a medium amber. Here, more complex, nutty, and slightly bitter notes emerge, creating a more balanced and sophisticated flavor. This is often the sweet spot for a well-rounded praline. Pushing beyond this, towards 350°F (177°C), yields a dark caramel with pronounced bitterness, smoky notes, and less perceived sweetness. This is a bold, assertive flavor used by experts for specific applications.
The greatest challenge in this process is the speed at which the temperature accelerates at the end. As the COMSOL blog on caramel science notes, this is a matter of physics:
When the caramel starts to brown, that means that 80% of the water in the substance has evaporated. Water requires so much energy to boil that the temperature will be constant at the water’s boiling point, and when most of the water has evaporated, all of that energy is used to increase the temperature of the caramel. The temperature of the caramel can rise so rapidly that it is hard to keep it in the desired temperature range. As a result, the caramel could burn and taste bitter.
– COMSOL Blog, The Science Behind Cooking Caramel
This rapid acceleration is why “carryover cooking” is so significant. The residual heat in the pan will continue to cook the caramel even after it’s removed from the stove. The key to control is to anticipate this and remove the caramel from the heat just *before* it reaches your perfect color, allowing it to coast to its final destination. This precise control over thermal chemistry is what separates an amateur from a master.
By understanding that salt is a flavor amplifier and that temperature is the ultimate arbiter of texture, you can approach caramel not as a recipe, but as a system to be manipulated. This knowledge empowers you to move beyond imitation and into the realm of creation, crafting caramels that are perfectly tailored to your exact sensory goals.
Frequently Asked Questions About Caramel Color and Flavor
What temperature produces light amber caramel ideal for delicate pralines?
Light amber caramel forms at 320-330°F (160-165°C), producing sweet, buttery notes with minimal bitterness, perfect for nut pralines where you want the nut flavor to dominate.
How can I identify medium amber caramel without a thermometer?
Medium amber caramel (330-345°F) has a rich golden-brown color similar to honey and releases a toasty, nutty aroma. This stage is ideal for balanced praline with complex flavor.
Why does carryover cooking affect final caramel color?
The retained heat in the pan continues to cook the caramel for 30-60 seconds after removing from heat, potentially darkening it by 1-2 shades. Remove caramel from heat just before reaching target color.