The iconic hot cake and cold cream pairing is a feat of sensory engineering, not just a simple recipe.
- Mastering it involves controlling meltdown dynamics through specific ice cream properties like overrun and fat content.
- Success depends on precise service timing, with a target of under 45 seconds from the moment of plating to the guest’s table.
Recommendation: Treat every element—from the type of vanilla used to the material of the ceramic plate—as a critical variable in a controlled thermal system to create a truly memorable experience.
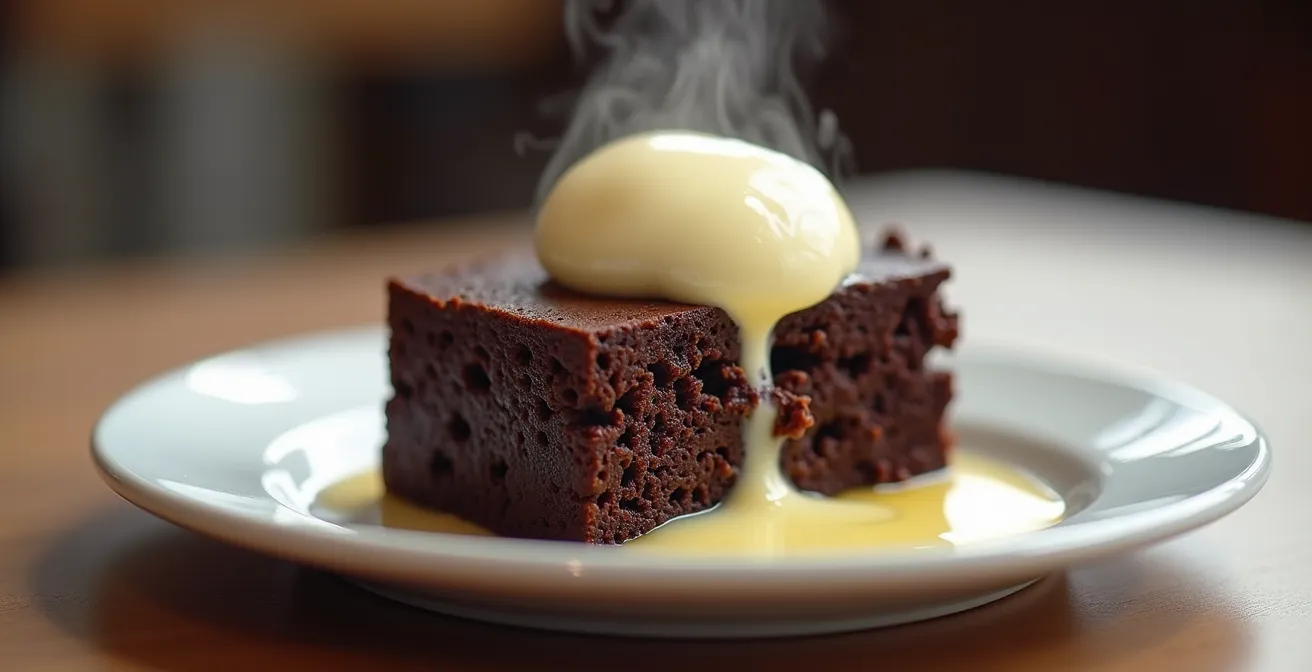
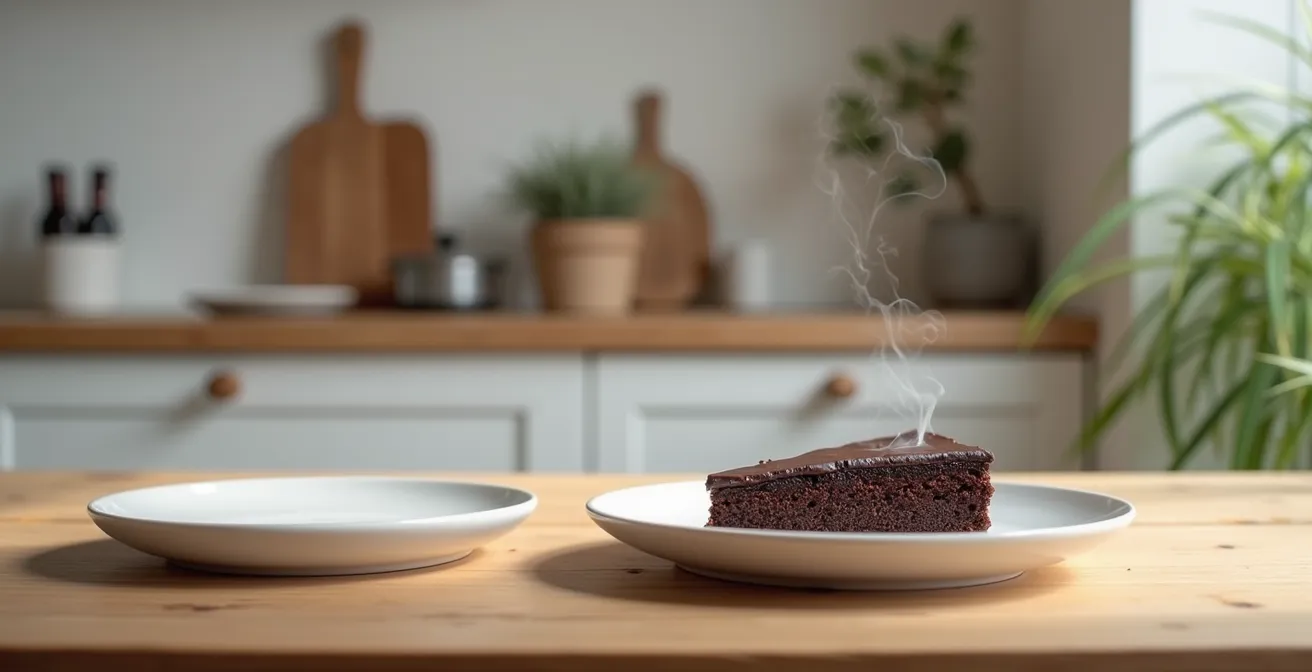
For any restaurateur, the pairing of a warm, molten chocolate cake with a scoop of cold vanilla cream is more than a menu staple; it’s a moment of pure sensory delight for the guest. Many assume the magic lies simply in the basic contrast of hot and cold, or the classic chocolate-vanilla flavor combination. The usual advice revolves around ensuring the cake is gooey and the ice cream is frozen. But this surface-level approach leaves the final experience to chance, leading to a rapidly melting puddle, muted flavors, or even a cracked dessert plate during a busy service.
What if the key to perfecting this dessert wasn’t just about temperature, but about thermal engineering? The true art lies in understanding and manipulating the physics and chemistry at play. This perspective transforms the dessert from a simple assembly to a carefully constructed sensory experience. It requires a deeper look into how temperature dictates flavor release, how the structure of a frozen cream affects its mouthfeel and melting rate, and how the timing of every step in the service chain is critical to delivering the intended contrast.
This guide moves beyond the obvious to explore the underlying science. We will deconstruct each component—the vanilla, the cream’s structure, the cake’s core, the plating, and the service timeline—to give you precise, actionable control. By mastering these principles, you can elevate a classic dessert into a consistent, reliable, and unforgettable signature item that showcases your establishment’s attention to detail.
To help you master this culinary balancing act, this article breaks down the essential scientific and practical considerations. The following sections provide a complete roadmap, from ingredient selection to the final moments of service, ensuring you can engineer the perfect hot and cold dessert experience every time.
Summary: Why Is Cold Vanilla Cream the Perfect Partner for Hot Chocolate Cake?
- Pod vs. Extract: Which Release Flavor Better in Cold Cream?
- How to Slow Down the Melting of Ice Cream on Hot Cake?
- Liquid Cream vs. Churned Gelato: Which Mouthfeel Works Best?
- The Plating Mistake That Cracks Your Ceramic Ware
- Timing the Service: Synchronizing Kitchen and Dining Room
- How to Time the Baking of Lava Cakes to the Exact Second?
- How to Thicken Hot Chocolate Without Cornstarch for a Velvety Texture?
- Churros vs. Biscuits: What is the Ideal Dipping Partner?
Pod vs. Extract: Which Release Flavor Better in Cold Cream?
The choice between vanilla pod and extract is not merely about cost; it is a fundamental decision in flavor engineering. The vanilla flavor in a cold component like cream or ice cream is dictated by the volatility of its aromatic compounds. While extract provides a potent and immediate hit of vanillin—the primary flavor molecule—it lacks the complexity required for a sophisticated pairing. A real vanilla pod is a reservoir of nuanced flavors that behave differently at cold temperatures.
Scientific analysis reveals there are more than 250 trace compounds in a vanilla pod, including esters, phenols, and acids, which are less volatile than pure vanillin. In a cold cream, these heavier compounds release more slowly, providing a layered and evolving flavor profile as the cream gently warms in the mouth. This slow release creates a persistent, rich vanilla background that can stand up to the intense flavor of dark chocolate without being overpowering.
As experts in flavor chemistry note, this complexity is crucial for a successful pairing with cacao. The diverse aromatic compounds from the pod do more than just add a “vanilla” taste; they interact with the chocolate on a molecular level. As stated by the specialists at Vanilla Bean Kings:
Its aromatic compounds interact with the complex flavor profile of cacao, smoothing out bitterness, enhancing sweetness, and deepening the overall richness.
– Vanilla Bean Kings, How to Use Vanilla When Making Chocolate
For a restaurateur, this means using a real vanilla pod, infused into the cream base over a low heat and then chilled, is the superior method for creating a truly premium dessert. The extract is a shortcut that sacrifices the very depth that makes the pairing iconic. The investment in a real pod translates directly to a more complex and memorable sensory experience for the guest.
How to Slow Down the Melting of Ice Cream on Hot Cake?
The dramatic race against time as ice cream melts on a hot cake is not inevitable; it is a variable that can be controlled through science. The melting rate, or meltdown dynamics, is primarily governed by two factors: fat content and overrun. Overrun refers to the amount of air incorporated into the ice cream during churning. A high overrun results in a lighter, fluffier texture but also a fragile structure that collapses quickly when exposed to heat.
For a restaurant setting, selecting or producing an ice cream with low overrun is critical. Detailed research highlights the direct link between low overrun and superior melting resistance. Denser ice creams, with less air, have more tightly packed ice crystals and fat globules, creating a more stable structure that melts slowly and evenly. This ensures the guest experiences a pleasing textural contrast for a longer duration, rather than a soupy mess within a minute.
The second key is butterfat content. Fat globules insulate the ice crystals, physically slowing down the melting process. An ice cream with a butterfat content of 15-20% will exhibit significantly better shape retention and a creamier mouthfeel as it melts. This controlled, velvety melt is far more luxurious than the rapid liquefaction of a low-fat, high-overrun product. Mastering these properties allows you to engineer an ice cream that complements the hot cake instead of succumbing to it.
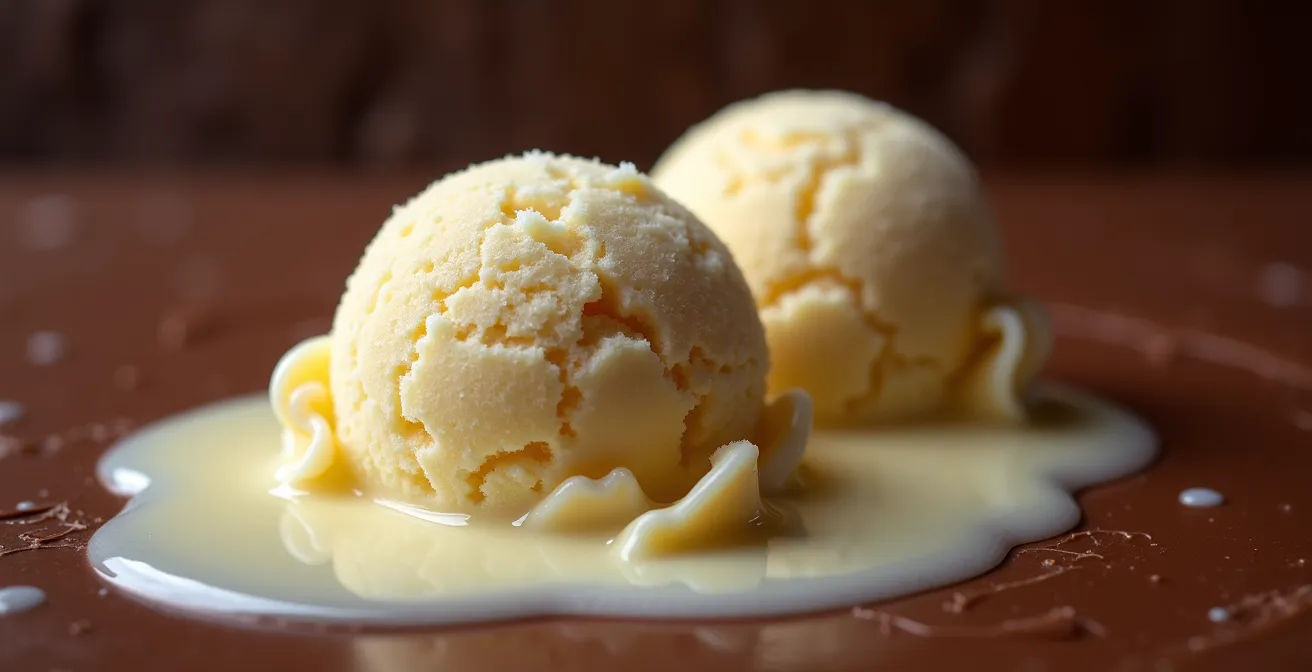
This macro view demonstrates the structural differences at play. A well-engineered ice cream doesn’t just dissolve; it transitions gracefully from a solid to a creamy, rich sauce, extending the window of optimal sensory contrast. It’s about transforming a liability—melting—into a feature of the dessert.
Your Action Plan: Controlling Meltdown Dynamics
- Target Composition: Choose or create an ice cream with a 15-20% butterfat content and low overrun for a dense, stable structure.
- Optimize Serving Temperature: Store service-ready ice cream at around -12°C (10°F), which is slightly warmer than deep storage, for better scoopability without compromising stability.
- Create a Barrier: Apply a thin, quick-setting chocolate shell or a dusting of cocoa powder on the cake’s surface to create a minimal thermal barrier, slowing the initial heat transfer.
- Pre-scoop for Service: Scoop portions onto a pre-frozen sheet pan lined with parchment paper. This hardens the exterior of the scoop, giving you a crucial 30-60 second advantage during plating.
- Evaluate Alternatives: Consider using gelato, which is naturally denser and has lower overrun than traditional American-style ice cream, for superior melting resistance.
Liquid Cream vs. Churned Gelato: Which Mouthfeel Works Best?
The choice between a fluid cold element, like a chilled vanilla crème anglaise, and a churned one, like gelato, fundamentally alters the dessert’s textural narrative. It’s a decision between a smooth, coating sensation and a dense, plastic-like texture. From a thermal perception standpoint, each serves a different purpose. A liquid cream provides an immediate, widespread cooling effect, but it quickly blends with the cake, leading to a homogenous, lukewarm temperature. The initial sensory dissonance is sharp but fleeting.
A churned gelato, on the other hand, offers a more complex and prolonged experience. Its defining characteristic is its density, a result of having significantly less overrun (air) than traditional ice cream. As food science experts note that low-overrun gelato is denser and melts slower than its airier counterparts. This density does two things: it provides a substantial, almost chewy mouthfeel that contrasts beautifully with the soft cake, and its lower thermal conductivity means it melts more slowly and retains its cold temperature for longer.
This slow meltdown is the key. Instead of instantly becoming a sauce, the gelato holds its form, allowing the guest to have bites that are distinctly hot and bites that are distinctly cold. The structural integrity of the gelato acts as a thermal buffer, preserving the sensory contrast throughout the experience. While a liquid cream offers elegance, a high-quality, dense vanilla bean gelato provides a more dynamic and satisfying textural journey.
For the restaurateur aiming for the ultimate hot-and-cold experience, gelato is the more technically sound choice. Its physical properties are simply better engineered to withstand the thermal shock of the hot cake, ensuring the dessert arrives at the table and is consumed with its core sensory premise intact. The liquid cream is a sauce; the gelato is a partner.
The Plating Mistake That Cracks Your Ceramic Ware
A shattered plate during service is not just a financial loss; it’s a symptom of a failure to respect the laws of physics, specifically thermal shock. This phenomenon occurs when a material experiences a rapid and extreme temperature change, causing different parts of it to expand or contract at different rates, leading to stress fractures. Placing a piping hot lava cake directly from a 218°C (425°F) oven onto a room-temperature or, even worse, a chilled ceramic plate creates the perfect conditions for this failure.
The material of your dishware is the most critical variable. Different ceramics have vastly different tolerances. Standard earthenware and bone china have low resistance to thermal shock and are high-risk choices for this dessert. High-quality porcelain offers better performance, but the gold standard for professional kitchens is alumina porcelain. Fortified with aluminum oxide, this material is engineered for durability and superior thermal resilience, with some products able to withstand up to a 200°C thermal shock. Investing in the right serveware is a form of insurance against service disruptions.
Beyond material choice, pre-warming the plates is a non-negotiable step. Storing dessert plates in a plate warmer or on top of a low-heat oven brings their temperature closer to that of the cake, dramatically reducing the temperature differential and thus the risk of cracking. It also helps in keeping the cake warm on its journey to the table.
The following table, based on material science, breaks down the risk associated with common dishware materials when subjected to the hot cake/cold plate scenario. This is a crucial reference for any purchasing or operational decisions.
| Material | Thermal Shock Resistance | Risk Level for Hot/Cold Contact |
|---|---|---|
| Earthenware | Low | High Risk |
| Stoneware | Medium | Medium Risk |
| Porcelain | Medium-High | Medium Risk |
| Bone China | Low-Medium | High Risk |
| Alumina Porcelain | Very High | Low Risk |
Timing the Service: Synchronizing Kitchen and Dining Room
The perfect thermal contrast is a fleeting moment, and its successful delivery depends on a flawlessly executed timeline. The moment the hot cake is plated with the cold cream, a countdown begins. The entire process, from the final touch in the kitchen to its arrival at the guest’s table, must be a masterclass in efficiency. For this specific dessert, the optimal window is incredibly short—ideally, under 45 seconds. This requires absolute synchronization between the pastry station and the front-of-house staff.
The process starts before the cake even leaves the oven. All components—the pre-warmed plate, pre-scooped gelato, and any garnishes—must be staged and ready. Once the cake is baked, a brief rest of about one minute is essential for its delicate structure to set. Then, plating should be executed in 15 seconds or less. The final and most critical phase is the 30-second journey from the pass to the table. This is where communication and clear pathways are paramount.
Understanding the science of the meltdown reinforces this urgency. As researchers from PMC note, the structural collapse is a complex process:
Ice cream exhibits distinct meltdown behaviors at room temperature, as determined by the structural aspects created during manufacturing. In general, as the ice melts, ice cream either turns completely into a flowing liquid (complete collapse) or retains a portion of its original shape (partial collapse), leaving a solid-like melted ice cream foam.
– PMC Research, The Science of Ice Cream Meltdown and Structural Collapse
The goal is to deliver the dessert while the ice cream is still in the “partial collapse” phase, where it has softened but not yet liquefied. This requires a finely tuned operational sequence:
- Preparation: Before the oven timer goes off, have all garnishes, sauces, and pre-warmed plates ready at the plating station. The ice cream should be pre-scooped and held on a frozen tray.
- Resting (60 seconds): Once baked, let the lava cake rest in its ramekin for one minute. This allows the exterior to firm up, preventing it from breaking during plating.
- Plating (15 seconds): Invert the cake onto the plate, add the scoop of ice cream, and apply any final garnish. The plate must be at the pass immediately.
- Delivery (30 seconds): The runner or server must pick up the plate and deliver it directly to the table without delay.
How to Time the Baking of Lava Cakes to the Exact Second?
The defining feature of a lava cake is its molten chocolate center, a result of underbaking the batter. Achieving this perfect state consistently across every order is a matter of precision, not guesswork. Relying solely on a timer is a common mistake, as variables like oven hot spots, ramekin material, and initial batter temperature can alter the outcome significantly. True mastery comes from understanding the visual and physical cues of doneness.
The first step is standardization. The batter should always be brought to a consistent temperature—ideally 21°C (70°F)—before baking. A chilled batter will require more time, risking an overcooked exterior. Similarly, you must understand your oven’s unique personality. The “toast array” method, where you cover an oven rack with slices of bread and bake them to see which ones brown fastest, is a simple yet effective way to map your oven’s hot and cool zones. This allows you to position ramekins for even baking.
During the bake, visual cues are your most reliable guide. You’re looking for a specific state of transition:
- Firm Edges: The outer edges of the cake will look set and slightly puffed, pulling away from the sides of the ramekin.
- Jiggly Center: The very center of the cake, about 1.5 inches in diameter, should still be soft and have a noticeable jiggle when you gently shake the pan. It should move like a firm pudding, not a liquid slosh.
- Surface Texture: The top should look mostly matte, not wet or overly glossy, except for that small center spot.
A typical bake time in pre-portioned 6-ounce ramekins is between 8-10 minutes at 218°C (425°F), but these visual checks are what allow for second-perfect timing. A cake pulled too early will collapse entirely, while one pulled seconds too late will be a solid, disappointing chocolate cake.
How to Thicken Hot Chocolate Without Cornstarch for a Velvety Texture?
In the context of a lava cake, the “hot chocolate” is the molten core. Achieving a rich, velvety, and stable lava without resorting to cornstarch—which can impart a chalky taste and a gelatinous texture—is a hallmark of a high-end dessert. The key lies in leveraging the natural properties of the ingredients through technique. The goal is to create a stable emulsion that flows luxuriously when the cake is cut.
One of the most effective professional methods is to build the cake batter around a ganache base. By creating a dense ganache with a high ratio of chocolate to cream and letting it set, you can then portion this solid ganache and enclose it within the cake batter before baking. As the cake bakes, the ganache melts into a perfect, naturally thick, and stable liquid core. This technique provides absolute control over the texture and richness of the “lava.”
Other methods focus on emulsification and reduction within a sauce that could be paired with a different style of chocolate cake:
- Reduction: Gently simmering the chocolate and cream base allows water to evaporate, naturally concentrating the fats and solids. This deepens the flavor and thickens the mixture without additives. Vigorous whisking during this process helps create a stable emulsion.
- Leveraging Cocoa Butter: The natural cocoa butter in high-quality chocolate is a powerful thickener. By using a chocolate with high cocoa butter content and carefully controlling the temperature, you can achieve a perfect viscosity as the sauce cools slightly.
- Natural Emulsifiers: For an incredibly smooth and velvety texture in a chocolate sauce, a tiny amount of lecithin (derived from soy or sunflower) can be used. It’s a powerful emulsifier that binds the fats and water, creating a homogenous, glossy finish that coats the palate beautifully.
These techniques rely on a fundamental understanding of chocolate as an ingredient, treating it not just as a flavor but as a structural component. They produce a result that is texturally superior and purer in flavor than any starch-thickened alternative.
Key Takeaways
- The perfect hot/cold dessert is an act of thermal engineering, not an accident of taste.
- Controlling meltdown is key: use low-overrun, high-fat gelato and pre-scoop portions for service.
- Synchronization is everything: a sub-45-second timeline from plating to table is critical to preserve the sensory contrast.
Churros vs. Biscuits: What is the Ideal Dipping Partner?
While the lava cake is a self-contained unit, some desserts are designed around a separate hot chocolate sauce for dipping. In this scenario, the choice of “dipping partner” is critical to the overall textural experience. The two main contenders, churros and biscuits (or shortbread cookies), function in fundamentally different ways due to their structure. A biscuit is dense and acts as a scoop, while a churro is porous and acts as a sponge.
From a sensory engineering perspective, the churro is the superior vessel for delivering a hot chocolate experience. Its star-shaped, ridged exterior dramatically increases its surface area, allowing it to pick up and hold significantly more chocolate sauce per dip. Furthermore, its fried, airy internal structure is highly absorbent, soaking the sauce into its core. This ensures that every bite delivers a high chocolate-to-dough ratio. The crisp, fried exterior also provides crucial structural integrity, preventing it from crumbling and disintegrating in the hot sauce—a common failure point for many biscuits.
A biscuit, being dense and flour-based, has low absorption. It primarily functions as a delivery vehicle for a small amount of sauce that clings to its surface. While the buttery flavor of a shortbread can be a pleasant pairing, it does not integrate with the chocolate in the same way. The textural experience is one of separation: a crisp biscuit with a layer of sauce on top. The churro creates an experience of fusion: a crisp-soft vessel saturated with warm chocolate.
The following table breaks down the key structural differences that make the churro a more effective dipping partner for a rich, liquid chocolate sauce. This analysis can guide menu development for a more satisfying and less messy guest experience.
| Property | Churros | Biscuits |
|---|---|---|
| Structure | Fried, airy, sponge-like | Dense, flour-based |
| Surface | Ridged (increased surface area) | Flat or smooth |
| Absorption | High (acts as sponge) | Low (acts as scoop) |
| Structural Integrity | Crisp exterior prevents disintegration | Prone to crumbling |
| Chocolate-to-dough ratio | Higher due to ridges | Lower due to flat surface |
Apply this thermal engineering mindset to your dessert menu today and transform a classic pairing into a signature sensory experience that sets your establishment apart.