
Contrary to popular belief, tempering isn’t just about melting chocolate—it’s about mastering molecular science to build the perfect crystal structure.
- Cocoa butter can form six different types of crystals; only one (Beta V) creates the desired snap, shine, and stability.
- The process of heating, cooling, and agitating is designed to eliminate unstable crystals and promote only the stable Beta V form.
Recommendation: Stop following temperatures blindly. Understand the ‘why’ behind each step to diagnose problems and achieve consistent, professional results.
Have you ever crafted a beautiful chocolate creation, only to see it become dull, streaky, or—worst of all—melt the second someone touches it? This common frustration isn’t a failure of your recipe, but a misunderstanding of the physics at play. Most guides will tell you to simply melt chocolate to a specific temperature, cool it down, and then gently rewarm it. They give you the “what,” but they completely miss the crucial “why.” Without understanding the science, you’re merely following a recipe in the dark.
The secret to glossy, snappy, and stable chocolate lies not in a magic temperature, but in a fascinating molecular process called polymorphism. Cocoa butter, the fat in chocolate, is a complex substance. When it solidifies from a liquid state, it can arrange its molecules into six different crystal structures, labeled Form I through Form VI. Five of these are unstable, weak, and have low melting points. They are the culprits behind soft, dull chocolate that leads to messy fingers. But one form, the Beta V crystal, is dense, stable, and strong. It’s the hero of our story.
So, what if the real key wasn’t just hitting the right numbers on a thermometer, but actively encouraging the growth of these perfect Beta V crystals while eradicating all the others? This article will shift your perspective from that of a baker to that of a crystal scientist. We’ll break down the molecular dance happening in your bowl and give you the knowledge to control it. We’ll explore why only Beta V crystals matter, how to cultivate them using various methods, and how to recognize when you’ve achieved that perfect, stable structure. By the end, you won’t just know how to temper chocolate; you’ll understand it.
For those who prefer a visual format, the following video provides a great overview of the tempering process in action, perfectly complementing the scientific principles we will explore in this guide.
To help you navigate this deep dive into the science of chocolate, we’ve structured this guide to build your knowledge from the foundational principles to practical application. The following summary outlines the key stages of our exploration.
Summary: The Complete Guide to Mastering Chocolate Crystallization
- Why Are Beta V Crystals the Only Stable Form We Want?
- How to Temper Chocolate Using the Seeding Method at Home?
- Table Tempering vs. Microwave: Which Method Is More Reliable?
- The Temperature Spike Mistake That Causes White Streaks
- How to Keep Chocolate in Temper While Dipping 50 items?
- How to Use the Sous-Vide Method for Perfect Tempering Every Time?
- How to Use Cocoa Butter to Thin Chocolate for Spraying?
- The Knife Test: How to Read the Streaks in 3 Minutes?
Why Are Beta V Crystals the Only Stable Form We Want?
To understand tempering, we must first think of liquid chocolate not as a simple melted substance, but as a chaotic soup of cocoa butter molecules. When this soup cools, these molecules begin to lock together into solid crystals. This process is called crystallization. The problem is that cocoa butter molecules can lock together in six different patterns, or polymorphs. Forms I through IV are loose, disorganized, and unstable. They form a soft solid with a dull finish and a melting point so low it will liquefy on your fingertips.
The Beta V crystal is the only structure we want. It is a highly ordered, dense, and compact triclinic polymorph. This tight-knit structure is what gives well-tempered chocolate its signature “snap” when broken. It also reflects light evenly, creating a beautiful, glossy sheen. Most importantly, its density gives it a higher melting point—right around human body temperature (98.6°F or 37°C). This is why a perfectly tempered piece of chocolate feels solid in your hand but melts luxuriously in your mouth.
The entire goal of tempering is to manipulate temperature and motion to selectively create a high population of these Beta V crystals. The process is a form of controlled breeding at a molecular level. Research published in Nature Communications confirms that the optimal temperature window between 88°F and 90°F (31-32°C) is where Beta V crystals form exclusively. Going above or below this narrow range invites the formation of unstable crystals. Scientists are even exploring how additives like specific phospholipids can direct crystallization toward this desirable form, highlighting the precision required.
How to Temper Chocolate Using the Seeding Method at Home?
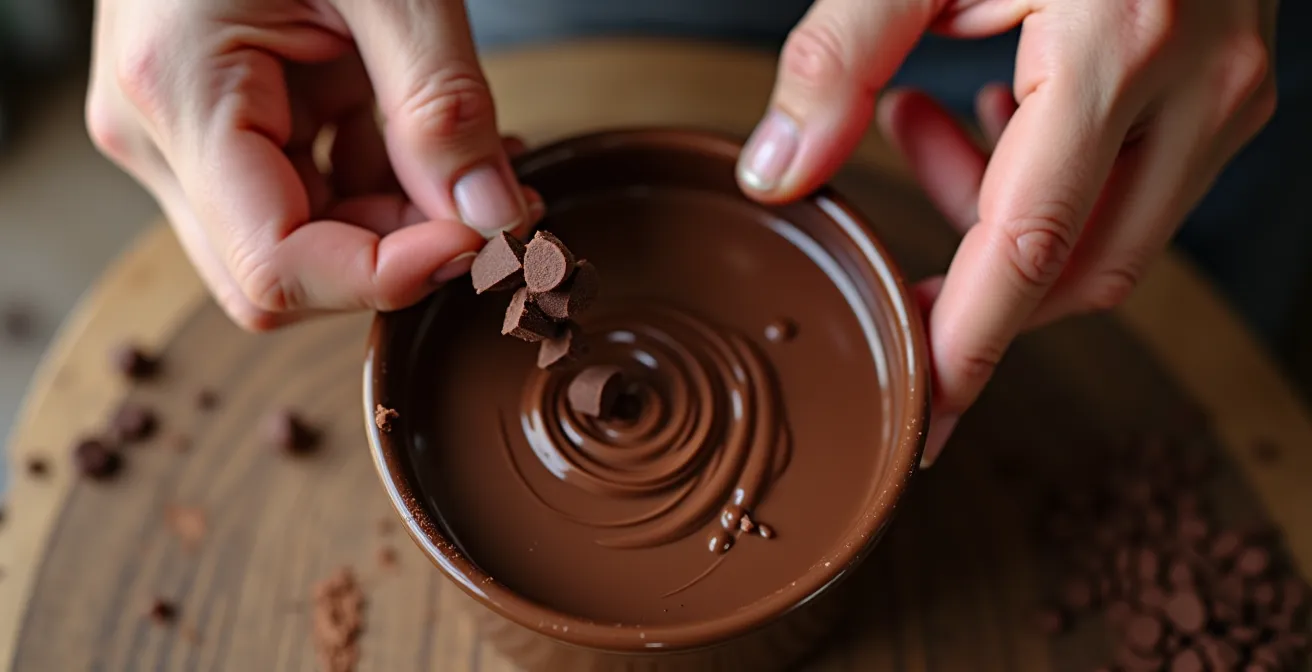
Now that we understand our goal is to cultivate a thriving population of Beta V crystals, how do we achieve this in a home kitchen? The most reliable and intuitive method is called “seeding.” The logic is simple: if you need to create Beta V crystals, why not introduce a “seed” of already perfectly formed Beta V crystals into your melted chocolate? This seed then acts as a template, encouraging all the free-floating cocoa butter molecules to align in the same stable structure.
Where do you find these seed crystals? In any piece of high-quality, solid chocolate that already has a good snap and shine. That’s right—the block of chocolate you start with is your source of perfect Beta V crystals. The process involves melting most of your chocolate to a high temperature (around 115°F/46°C for dark chocolate). This effectively erases all existing crystal structures, both good and bad, creating a clean slate. Then, you remove it from the heat and stir in finely chopped, un-melted “seed” chocolate. This is the crucial step where you introduce the Beta V templates.
As you stir continuously—a process we can call molecular agitation—two things happen. The seed chocolate melts, releasing its Beta V crystals into the mixture, and the overall temperature of the batch drops. This combination of falling temperature and the presence of stable templates encourages the formation of a dense network of new Beta V crystals. You cool the chocolate to around 82°F (28°C) to maximize crystal growth, then gently rewarm it to the working temperature of 88-90°F (31-32°C) to melt out any unstable crystals that may have formed. You now have a bowl of perfectly tempered chocolate, full of the stable crystals you need.
Table Tempering vs. Microwave: Which Method Is More Reliable?
While seeding is a fantastic all-purpose method, it’s not the only way to encourage Beta V crystal formation. Two other common methods are table tempering (tabling) and microwave tempering, each with distinct advantages and disadvantages based on the principles of heat transfer and agitation. Understanding their mechanics helps in choosing the right tool for the job. Tabling is the classic, dramatic method favored by professionals for its superior results with larger batches. It relies on rapid, controlled cooling on a cold surface like marble to initiate crystallization. In contrast, the microwave method is a modern shortcut, best for small quantities, that relies on extremely gentle heating to avoid destroying the existing Beta V crystals in solid chocolate.
The following table, based on expert consensus, breaks down the core differences. It illustrates the trade-offs between batch size, time, and the quality of the final crystal structure. As a comparative analysis from Sugar Geek Show highlights, there is no single “best” method; the choice depends entirely on your specific goal, whether it’s quickly dipping a few strawberries or creating hundreds of delicate, molded chocolates.
| Method | Batch Size | Time Required | Crystal Quality | Best Application |
|---|---|---|---|---|
| Microwave | <400g | 10-15 min | Good if careful | Simple dipping, small batches |
| Table/Marble | 500g-2kg | 20-30 min | Superior density | Thin coatings, molds |
| Seeding | Any size | 15-20 min | Consistent | General purpose |
The microwave method is the riskiest for a beginner, as it’s easy to overshoot the temperature and melt your precious Beta V crystals. Tabling offers the most control and the highest quality crystal formation but requires space, equipment, and practice. For someone starting out, seeding remains the most reliable because it provides a clear, physical addition of the correct crystals, leaving less to chance.
The Temperature Spike Mistake That Causes White Streaks
One of the most disheartening sights for any chocolate maker is fat bloom: those ugly white or grayish streaks that appear on the surface of your finished product. This is not mold or spoilage; it is the visible evidence of failed tempering. Fat bloom occurs when the unstable crystal forms (I-IV) in the cocoa butter rearrange themselves over time, migrating to the surface. This happens for one primary reason: you accidentally destroyed your Beta V crystals by overheating the chocolate during the final stage.
Remember, the working temperature for dark chocolate is around 88-90°F (31-32°C). It can be tempting to give it a little extra heat if it starts to thicken. This is a fatal mistake. As chocolate expert Dr. Paul Dimick notes, the stable Beta V crystals you worked so hard to create have a specific melting point. Once you heat the chocolate above 94°F (34.4°C), you begin to melt the good crystals, leaving the door open for unstable forms to take over as it cools again. This single temperature spike is the most common cause of fat bloom.
Preventing this requires vigilance and the right tools. A reliable digital or candy thermometer is non-negotiable. Constant stirring is also key, as it distributes heat evenly and prevents “hot spots” from forming, especially when using a microwave. Even a small, localized temperature spike can compromise the entire batch. Mastering temperature control is mastering tempering itself.
Action Plan: Preventing a Disastrous Temperature Spike
- Tool Check: Always use an accurate candy or digital thermometer to monitor the chocolate’s temperature. Do not rely on touch.
- Gentle Heating: When rewarming chocolate to maintain temper, use very short bursts of heat (e.g., 5 seconds in a microwave at 50% power or a few seconds over a double boiler).
- Constant Agitation: Stir continuously and vigorously after each heating interval to distribute the heat evenly and eliminate any potential hot spots.
- Workspace Discipline: Ensure your entire workspace, including all bowls, spatulas, and tools, is completely dry. A single drop of water can cause the chocolate to “seize,” making it a thick, grainy paste that cannot be tempered.
- Test, Don’t Guess: If you suspect you’ve overheated the chocolate, perform a quick temper test on a knife or spoon before proceeding. It’s better to re-temper the batch than to coat 50 items with unstable chocolate.
How to Keep Chocolate in Temper While Dipping 50 items?
You’ve successfully tempered a beautiful bowl of chocolate. It’s glossy, fluid, and ready to go. But tempering is not a static achievement; it’s a state you must actively maintain. As you work, the chocolate will naturally cool, and if left unchecked, it will thicken and fall out of temper. This is a major challenge when you have a large batch of items to dip. So, how do professionals keep their chocolate in that perfect working state for an extended period?
The key is a technique called “maintenance seeding.” Instead of a one-time seeding event, you treat it as a continuous process. As your chocolate cools and thickens, you introduce very small amounts of heat to bring it back into the 88-90°F (31-32°C) working window. Crucially, as described in a Brod & Taylor guide, you can also add a small piece of reserved, un-melted “seed” chocolate. This replenishes the population of Beta V crystals and ensures the structure remains stable, even as you gently reheat the batch. A professional dipping station is set up to facilitate this exact workflow.
Another strategy is to manage the environment. Work in a cool, low-humidity room (around 68°F/20°C). Use a warming cabinet or a specialized tempering machine that holds the chocolate at a precise temperature. For a home setup, placing your bowl of tempered chocolate on a heating pad set to its lowest setting can work wonders. The goal is to apply just enough ambient heat to counteract the natural cooling, keeping the chocolate within its narrow working range without ever spiking the temperature above that critical 94°F (34.4°C) threshold. This constant management is the difference between dipping five perfect strawberries and fifty.
How to Use the Sous-Vide Method for Perfect Tempering Every Time?
For those who crave absolute precision and repeatability, the sous-vide method offers a nearly foolproof way to temper chocolate. This technique takes the guesswork out of temperature control by using a circulating water bath to hold the chocolate at an exact temperature for a precise amount of time. Instead of heating a bowl over steam or in a microwave, you vacuum-seal the chocolate and submerge it in water. This ensures perfectly even heating with no risk of scorching, seizing from stray water droplets, or creating hot spots.
The process follows the same scientific principles: melt, cool, and rewarm. First, you set the water bath to a high temperature (around 118°F/48°C) to melt the chocolate completely and erase all crystal structures. Then, you rapidly cool the water bath by adding ice, bringing the chocolate down to the crystallization temperature (around 79°F/26°C). After holding it there to allow unstable crystals to form, you raise the temperature to the precise working window (e.g., 86°F/30°C for milk chocolate) and hold it. This final step melts away all unstable crystals, leaving only the perfect Beta V crystals behind. Agitating the bag in the water bath serves the same purpose as stirring.
This method’s primary advantage is control. As chocolatier Eddie Rozenblat points out in his sous-vide guide, it’s not just about the initial temper but also about maintenance. He explains the power of this technique:
In order to form enough beta crystals, we need to pre-crystallize (temper) the chocolate – only then we’ll get a snappy, shiny and hard to melt chocolate. Once the tempering process is completed, you have 3 minutes to work with the chocolate and fill your molds, but keeping the bags inside the sous vide container will allow you to extend this time as needed.
– Eddie Rozenblat, Sousvideer chocolate tempering guide
By keeping the bag or a bowl of chocolate in the water bath set to the working temperature, you can hold it in perfect temper for hours, making it ideal for complex projects.
How to Use Cocoa Butter to Thin Chocolate for Spraying?
Once you’ve mastered creating the perfect crystal structure, you can begin to manipulate the physical properties of your tempered chocolate for different applications. One of the most important properties is fluidity, or viscosity. For tasks like creating a very thin, delicate shell in a mold or spraying chocolate to create a velvet texture, you need the chocolate to be more fluid. Simply adding more heat is not an option, as it would destroy the temper. The solution is to add more cocoa butter.
Adding a small amount of extra cocoa butter increases the fat content relative to the cocoa solids, effectively thinning the chocolate without altering its taste significantly. However, you can’t just add melted cocoa butter. The added fat must also be in the stable Beta V crystal form, or it will disrupt the temper you’ve already achieved. This is where products like Mycryo, which is a powdered form of 100% pure cocoa butter in the stable Beta V crystal form, become invaluable.
This powder acts as both a thinning agent and a seeding agent simultaneously. For tempering from scratch, Callebaut, a leading chocolate manufacturer, recommends adding 1% Mycryo of the total chocolate weight to melted chocolate at the correct temperature. To thin already-tempered chocolate, you can gently stir in small amounts of the cocoa butter powder until you reach the desired consistency. As Callebaut explains, a more fluid chocolate is essential for achieving a thin, crunchy shell and for filling molds with intricate details, while a less fluid chocolate is better for casting larger molds in a single go. Controlling fluidity is an advanced technique that opens up a new world of creative possibilities.
Key Takeaways
- Tempering is the scientific process of promoting the stable Beta V crystal form in cocoa butter, which is solely responsible for chocolate’s snap, shine, and shelf life.
- The three critical stages are melting (to erase all crystals), cooling and agitating (to form new crystals), and rewarming (to eliminate unstable crystals).
- Methods like seeding, tabling, and sous-vide are all different ways to control temperature and agitation to achieve the same molecular goal: a high population of Beta V crystals.
The Knife Test: How to Read the Streaks in 3 Minutes?
After all the careful heating, cooling, and stirring, how do you know if you’ve actually succeeded? You don’t want to discover your mistake after you’ve already dipped dozens of cookies. The final and most critical step in the tempering process is to test your work. A simple, quick test will tell you everything you need to know about the crystal structure you’ve created. The most common method involves dipping a clean, dry tool—like the tip of a knife, a spoon, or an offset spatula—into the chocolate.
Set the coated utensil aside at a cool room temperature (around 68°F/20°C). A perfectly tempered chocolate, rich in Beta V crystals, will set up within about 3 to 5 minutes. The result should be a hard, even, and glossy coating with no streaks. It should be firm to the touch and shouldn’t melt instantly. The ultimate confirmation is the “snap” test: if you break a piece of the set chocolate, it should break cleanly with a sharp, crisp sound. This sound is the audible proof of a dense, well-formed crystal structure.
If the chocolate remains soft, tacky, or shows dull, chalky streaks after 5 minutes, your temper has failed. This means unstable crystals are dominant, and you must start the process over. Liz Marek of the Sugar Geek Show offers a wonderfully clear description of what to look for:
Do a test with your temper by placing a teaspoon of chocolate onto a piece of parchment paper and freezing it for 5 minutes. If it comes off the parchment cleanly and has a sharp snap when you break it, it’s tempered! If it bends when you try to break it and leaves a residue on your parchment paper, it’s not tempered.
– Liz Marek, Sugar Geek Show tempering guide
Learning to read these visual and auditory cues is the final skill. It transforms tempering from a hopeful guess into a predictable science, giving you the confidence to know your chocolate work will be a success before you even begin decorating.
By understanding the molecular science behind tempering, you are no longer just a cook following a recipe; you are an architect of texture and structure. This knowledge empowers you to troubleshoot problems, adapt to your environment, and consistently produce chocolate with a professional finish. The next logical step is to apply these principles and start experimenting with confidence.