In summary:
- The key isn’t one magic recipe, but a series of strategic compromises in flavor, design, and presentation.
- Aim for a chocolate percentage around 60% as the perfect “flavor middle ground” to satisfy both sweet and bitter preferences.
- Balance fun and elegance by using dual-design decorations or setting up an interactive toppings bar.
- Mastering logistics like transport, slicing, and storage is just as crucial as the baking itself for a successful event.
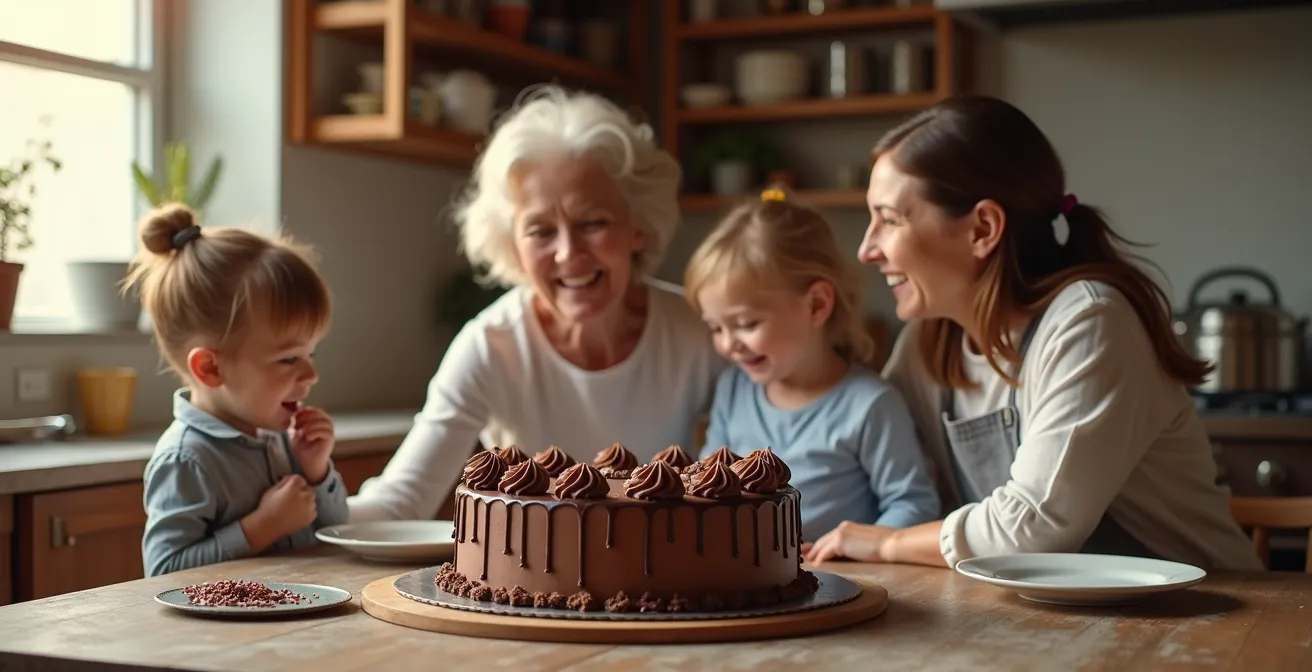
Every family party planner faces the same daunting challenge: the cake. Specifically, the chocolate cake. How do you bake a single dessert that will make a five-year-old’s eyes light up without being too sugary for their grandparents? It’s the ultimate baking dilemma. The common advice is to just “pick a classic recipe” or “use good ingredients,” but this ignores the fundamental tension between the youthful love for sweetness and fun, and the adult appreciation for deep flavor and elegance.
Many hosts get stuck between a cartoon-character cake and a sophisticated, dark-chocolate creation, often ending up with something that fully satisfies no one. You might find yourself juggling two separate desserts or simply defaulting to a bland middle-of-the-road option. But what if the solution wasn’t about finding a single perfect flavor, but about mastering the art of the strategic compromise? What if the cake itself could become a beautiful and delicious symbol of unity, designed to make every single guest feel catered to?
This guide moves beyond simple recipes to give you a party planner’s playbook. We’ll explore the precise chocolate percentage that hits the sweet spot for all ages, decoration techniques that bridge the gap between playful and chic, and the logistical secrets that ensure your masterpiece arrives and is served flawlessly. It’s time to stop guessing and start strategizing your way to the perfect, crowd-pleasing chocolate cake.
This article breaks down the essential strategies for creating a universally loved chocolate cake, from the science of flavor to the art of presentation. The following sections provide a clear roadmap to baking success.
Summary: A Strategic Guide to the Ultimate Crowd-Pleaser Chocolate Cake
- Milk vs. 50% Dark: Finding the “Crowd Pleaser” Percentage
- Sprinkles vs. Elegant Piping: Balancing Fun and Class
- The Box Hack That Keeps Tall Cakes Upright on Bumpy Roads
- How to Cut 20 Equal Slices from a Round Cake?
- How to Store Leftover Cake Without It Drying Out?
- How to Host a Blind Chocolate Tasting Party for under $100?
- How to Calculate Chocolate Quantities for a 200-Person Wedding?
- His and Hers: How to Offer Dark and Milk Options Elegantly?
Milk vs. 50% Dark: Finding the “Crowd Pleaser” Percentage
The foundation of a universally loved chocolate cake is its flavor profile. This is where the first strategic compromise comes into play. Young palates are highly sensitive to bitterness and gravitate toward sweet, milky flavors, while many adults prefer the complex, less-sweet notes of dark chocolate. Simply choosing a 50% cacao chocolate might seem like a safe middle ground, but it often fails to deliver the rich “chocolatey” experience adults crave. So, where is the true flavor middle ground?
The secret lies in the 60% to 70% cacao range. This bracket offers enough sweetness to appeal to younger guests while providing the depth and complexity that satisfies a more mature palate. According to baking experts, using chocolate in this range creates a harmonious balance in baked goods. In fact, renowned baking expert Alice Medrich recommends 60% chocolate as the safest bet for achieving a perfect balance. It’s robust enough to stand up to the other ingredients in a cake without overwhelming the senses with bitterness.
When selecting your chocolate, remember that baking bars are preferable to chocolate chips, as chips often contain stabilizers that prevent them from melting smoothly. For a truly masterful compromise, consider a layering strategy: use a 60-65% chocolate for the cake batter itself, and a slightly sweeter milk chocolate ganache or fudge frosting. This gives a deep flavor in the sponge with a more approachable sweetness on the outside, a winning combination for everyone.
Sprinkles vs. Elegant Piping: Balancing Fun and Class
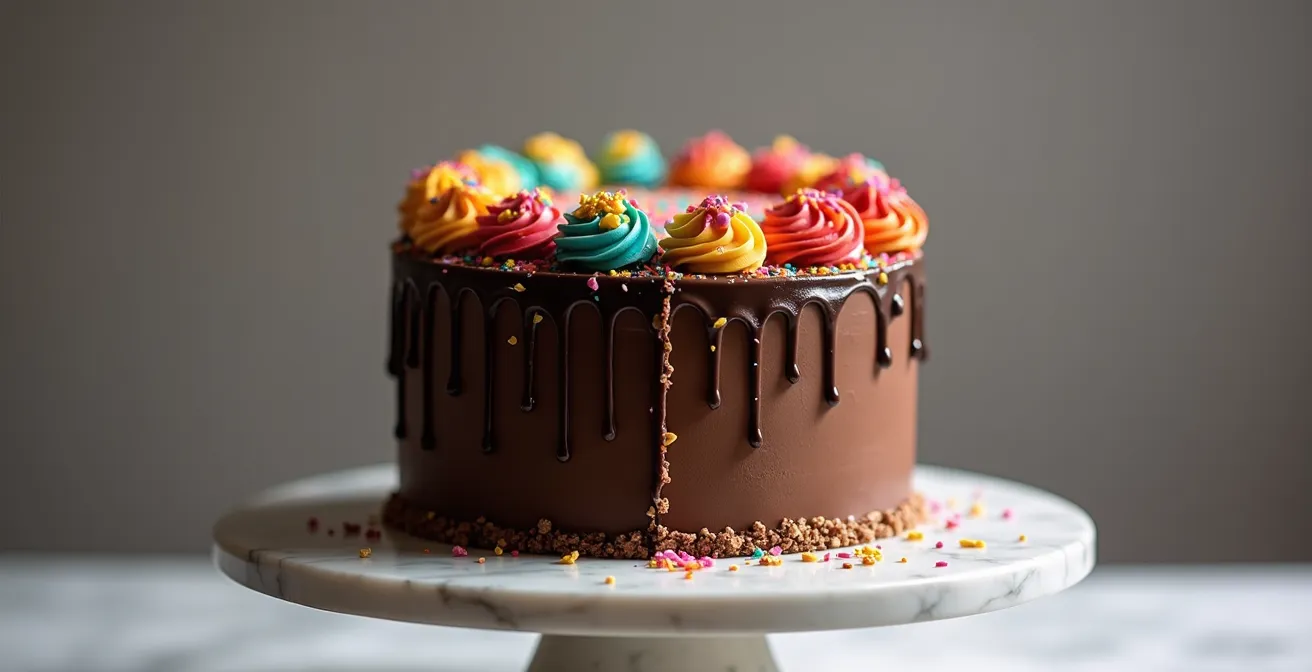
Once you’ve nailed the flavor, the next challenge is visual appeal. A cake for a mixed-age party needs to navigate the fine line between the joyful chaos of sprinkles and the sophisticated restraint of elegant piping. How can one cake be both fun for kids and classy for adults? The answer lies in “visual duality,” a design strategy that turns the cake into a conversation piece.
One of the most effective approaches is the half-and-half design. Imagine dividing the cake down the middle: one side is a playground of colorful sprinkles, bright frosting swirls, and maybe even a few small toys or figures. The other side is a study in elegance, featuring a smooth, dark ganache, minimalist piped rosettes, delicate chocolate shavings, or a touch of edible gold leaf. This creates a striking visual contrast that explicitly caters to both aesthetics. The key is to ensure the transition between the two styles is seamless and intentional, creating a beautiful gradient or a clean dividing line.
Another brilliant strategy is the interactive toppings bar. Bake and frost the cake with a universally appealing base, like a smooth chocolate ganache (which is richer and less sweet than buttercream frosting). Then, set up a “decoration station” with bowls of sprinkles, chocolate curls, fresh berries, and whipped cream. This empowers guests, especially children, to customize their own slice, turning dessert into a fun activity. A party planner who offered both a kid-friendly milk chocolate fudge frosting and a sophisticated ganache found that this choice allowed hosts to perfectly tailor the experience to their specific audience.
The Box Hack That Keeps Tall Cakes Upright on Bumpy Roads
You’ve baked and decorated the perfect cake; now comes the most nerve-wracking part of any party planner’s job: transportation. A beautiful, tall cake is a fragile masterpiece, and a bumpy car ride can quickly turn it into a tragic mess. The fear of a collapsed cake is real, but professionals use several “logistical grace” techniques to ensure it arrives in pristine condition. It starts with creating a cold, stable environment.
Before you even think about moving the cake, chill it thoroughly. A cold cake is a firm cake. Place it in the refrigerator for at least a few hours, or even the freezer for 30 minutes, before transport. This solidifies the buttercream and structure, making it far less prone to shifting. Next, turn your car’s air conditioning on full blast. A cold car acts like a mobile refrigerator, preventing any melting or softening en route. Forget the passenger seat; the flattest, most stable surface in your car is the floor. Place a non-skid mat on the floor of the passenger side or trunk, then set the boxed cake on top.
For multi-tiered or particularly tall cakes, a central dowel is non-negotiable. It acts as a spine, preventing layers from sliding. In fact, for maximum stability, some professional bakers recommend using one support dowel per inch of cake tier height. The ultimate hack is to be prepared for the worst by packing an emergency repair kit. A small container of extra frosting, a small spatula, and a few extra decorations can fix almost any minor smudge or crack upon arrival, ensuring your cake is picture-perfect.
Your Action Plan: Professional Cake Transport Checklist
- Crank the air conditioning to keep the car refrigerator-cold before placing the cake inside.
- Place the cake on a flat surface like the car floor, using a non-skid mat underneath to prevent sliding.
- For tall cakes, insert a sharpened wooden skewer or dowel through the center from top to bottom for ultimate stability.
- Chill the cake completely in the fridge or freezer before transport to make it as firm as possible.
- Pack an emergency repair kit with extra buttercream, spatulas, and decorations for on-site touch-ups.
How to Cut 20 Equal Slices from a Round Cake?
The cake has arrived safely, the “Happy Birthday” song has been sung, and now all eyes are on you. The pressure is on to cut the cake, and the goal is to produce clean, equal slices for a crowd of eager guests. The traditional “wedge” method is notoriously inefficient for round cakes, yielding a few large slices and many awkward, crumbling slivers. To serve a crowd of 20 or more, you need to think like a caterer and adopt the concentric circle method.
This technique maximizes the number of uniform slices from a round cake. Instead of cutting from the edge to the center, you start by carving a smaller circle in the middle of the cake, about two inches in from the outer edge. This creates an outer “ring” and a smaller inner “circle.” Then, you slice the outer ring into perfectly portioned rectangular pieces. This method is far more efficient and avoids the fragile, pointed tips of wedge-cut slices. Once the outer ring is served, you are left with a small, manageable round cake in the center, which you can then cut into traditional wedges.
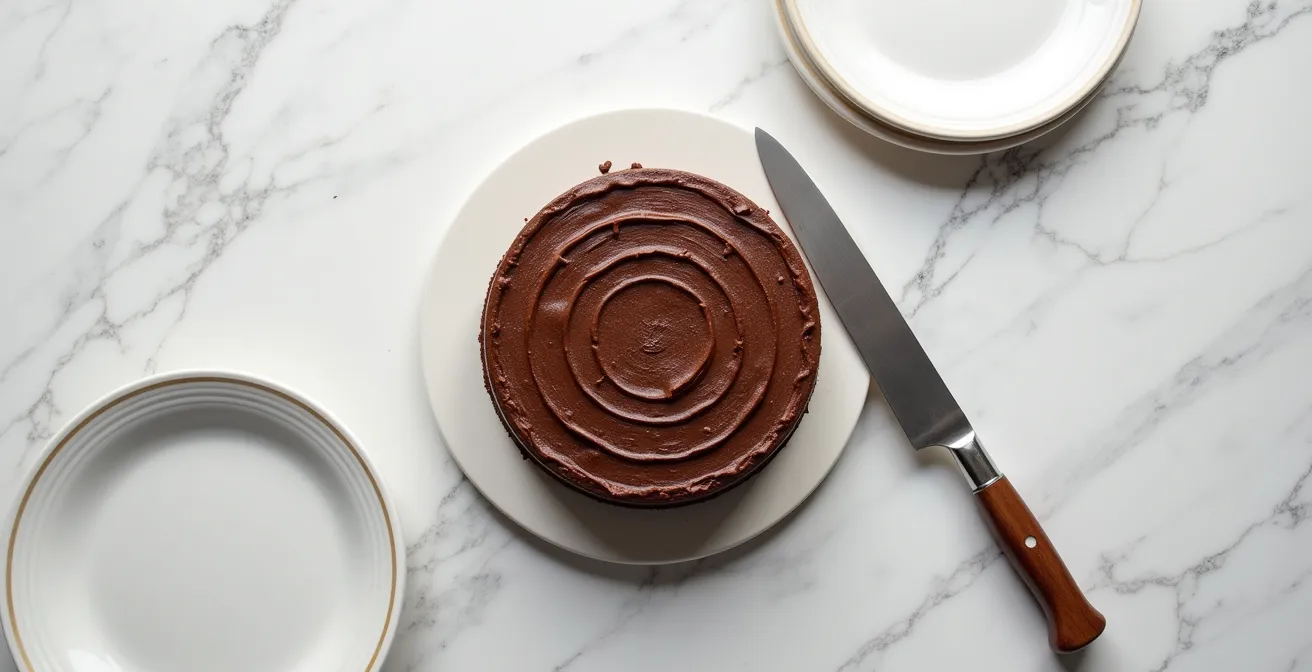
For consistent sizing, remember the industry standard. Professional caterers typically aim for party slices measuring about 1×2 inches. Using a long, sharp knife is crucial for clean cuts. For an even cleaner cut, dip the knife in hot water and wipe it dry between each slice. This warms the blade just enough to glide through the frosting and cake without dragging or crumbling the structure. This methodical approach ensures fairness, minimizes waste, and presents each slice beautifully—a final touch of logistical grace that elevates the entire cake experience.
How to Store Leftover Cake Without It Drying Out?
The party is over, and you’re left with a delicious, partially eaten chocolate cake. The worst-case scenario is letting that masterpiece dry out in the refrigerator, becoming a sad, crumbly shadow of its former glory. Proper storage is the final act of a thoughtful host, ensuring the cake remains enjoyable for days to come. The enemy of leftover cake is air, which leaches moisture from the exposed, cut surfaces.
Your first line of defense is to create a barrier. The most common method is to press a piece of plastic wrap directly onto the cut edges of the cake, ensuring it’s flush against the sponge to prevent any air from getting in. You can then store the cake in an airtight container at room temperature for up to four days. However, a far more effective—and surprising—trick is the bread slice method. Secure a slice of plain white bread to each cut surface of the cake using toothpicks. The bread acts as a sacrificial shield; the cake draws moisture from the bread, keeping the sponge soft and moist while the bread slice becomes hard and stale. As one food science analysis notes, the bread helps keep cake moist by giving up its own moisture and blocking airflow, a particularly useful trick for cakes that are nibbled on over several days.
For longer-term storage, the freezer is your best friend. Wrap individual slices tightly in a double layer of plastic wrap, then place them in a freezer bag or airtight container. This method preserves the cake’s texture and flavor for up to two weeks. When you’re ready for a treat, simply let a slice thaw at room temperature for an hour. These simple techniques ensure that not a single crumb of your hard work goes to waste.
How to Host a Blind Chocolate Tasting Party for under $100?
Now that you’ve mastered the art of the single crowd-pleasing cake, why not scale up the experience and turn the core concept—exploring chocolate flavors—into a party itself? Hosting a blind chocolate tasting is a sophisticated yet surprisingly affordable way to entertain. It takes the guesswork out of “what do people like?” and turns it into a fun, interactive discovery. The goal is to guide your guests through the nuances of chocolate without the bias of branding or packaging, all on a budget.
First, assemble your chocolate. You don’t need expensive artisanal brands. Head to a well-stocked supermarket and select 4-6 different chocolate bars with a wide range of cocoa percentages, from a sweeter 50-60% bar up to an intense 85% or higher. The variety is key. Break the bars into small, bite-sized pieces and arrange them on a platter, assigning each a number. Create simple numbered tasting cards so guests don’t know which brand or percentage they’re trying.
Next, set up palate cleansers. These are crucial for resetting the taste buds between samples. Simple items like plain water crackers, slices of green apple, and sparkling water work perfectly. Create simple scorecards for each guest, with columns for aroma, texture (is it snappy or creamy?), flavor notes (is it fruity, nutty, or earthy?), and a final preference ranking. This structure encourages guests to think critically and discuss their perceptions. As you guide the tasting, you can explain how a higher cocoa percentage generally means a more bitter taste due to less sugar, as detailed in the comparative guide below.
| Percentage Range | Classification | Flavor Profile | Best For |
|---|---|---|---|
| 60-69% | Semi-sweet | Balanced sweetness and bitterness | Baking and milder chocolate preference |
| 70-85% | Bittersweet and dark | Strong cocoa flavour and moderate to high bitterness | Intense chocolate lovers and wine pairing |
| 86-99% | Extra dark | Very bitter, minimal sweetness | Dark chocolate aficionados |
How to Calculate Chocolate Quantities for a 200-Person Wedding?
From an intimate tasting party, let’s scale up to the ultimate logistical challenge: a wedding. Calculating chocolate quantities for 200 guests can feel overwhelming, but the principles of strategic compromise still apply. It’s about anticipating preferences and planning for multiple components. You’re not just buying chocolate; you’re sourcing for the cake batter, the filling, the frosting, and any additional decorations or dessert table items.
The first step is to apply the 60/40 rule of preference. Event planners have found this to be a reliable guideline for large crowds. You should assume that roughly 60% of guests will prefer sweeter options (like milk, white, or semi-sweet chocolate), while the remaining 40% will gravitate towards the richer, more intense flavor of dark chocolate. This ratio becomes the foundation for all your quantity calculations, helping you decide how much of each type of chocolate to order for your various cake components.
Next, you must account for other desserts. If the wedding cake is the only dessert, your calculations can be straightforward. However, if there’s also a dessert bar with cookies, pastries, or a chocolate fountain, you can safely reduce your cake quantities by 15-20% for each additional dessert option available. Guests will naturally spread their choices across the different offerings. Finally, always add a baker’s margin. Professionals build a 10-15% buffer into their orders to account for any mistakes, spills, or miscalculations. This ensures you have more than enough to execute the cake perfectly without a last-minute panic.
Key Takeaways
- The “perfect” cake isn’t about one flavor, but about a strategy of balancing different tastes and expectations.
- A chocolate percentage around 60% often serves as the ideal middle ground for pleasing both kids and adults.
- Logistics matter: a well-transported, well-cut, and well-stored cake is as important as the recipe itself.
His and Hers: How to Offer Dark and Milk Options Elegantly?
For a large event like a wedding, the “strategic compromise” can evolve into its most elegant form: offering distinct choices within a unified presentation. The “His and Hers” concept is a classic example, allowing you to cater to two distinct preferences—typically dark vs. milk chocolate—without creating two separate, disconnected desserts. This is the pinnacle of personalized hospitality, scaled for a crowd.
The most visually stunning approach is a tiered cake with alternating flavors. For instance, the bottom tier could be a rich, decadent dark chocolate cake with a coffee-infused ganache, while the middle tier offers a lighter, sweeter milk chocolate cake with a salted caramel buttercream. The top tier can then be a neutral flavor like vanilla or a shared favorite. The exterior frosting can be uniform, creating a cohesive look, with the delicious secret hidden inside. The cake cutting becomes a moment of revelation as the different layers are revealed.
Another sophisticated method is to create a dessert duo. Instead of one large cake, you present two smaller, complementary cakes on a beautifully arranged dessert table. One might be an intense, flourless dark chocolate torte, while the other is a creamy milk chocolate mousse cake. This allows for clear flavor separation while maintaining a sense of curated elegance. This approach also works wonderfully for cupcakes, where you can offer trays of dark chocolate cupcakes with espresso frosting alongside milk chocolate cupcakes with vanilla bean frosting. Ultimately, this strategy of elegant duality demonstrates that accommodating different tastes isn’t a problem to be solved, but an opportunity to provide a more thoughtful and memorable experience for everyone.
By shifting your mindset from finding a single recipe to mastering a series of strategic compromises, you can transform the challenge of the “universal cake” into a creative and rewarding process. Start by applying these principles to your next family gathering and watch as everyone, from the youngest child to the most discerning adult, enjoys your thoughtful creation.