Achieving a flawless, drip-free éclair glaze is a matter of scientific precision, not guesswork.
- Uniformity begins with weighing each choux shell to control its thermal mass before glazing.
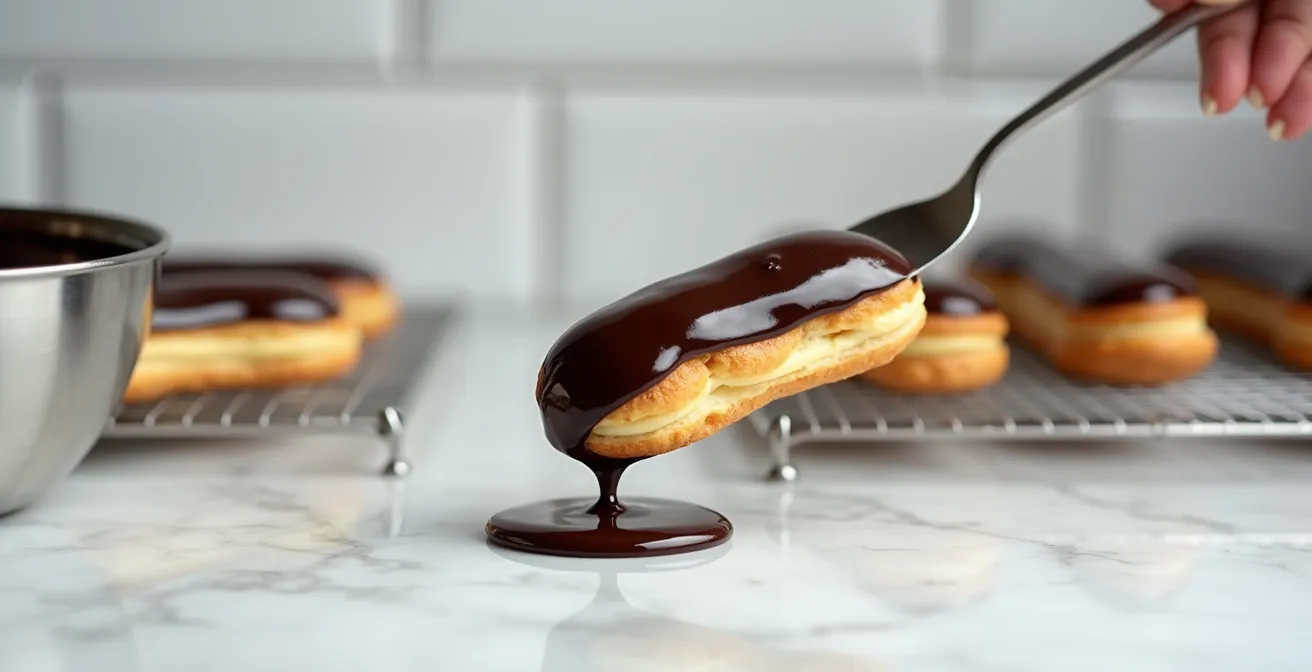
- Modern glazes like ganache require strict temperature control (35-38°C) for optimal flow and a fingerprint-resistant shine.
Recommendation: Master the interplay of weight, temperature, and timing to move from inconsistent results to boutique-level perfection.
The final moment of glazing an éclair should be a masterstroke, not a moment of anxiety. Yet, for many perfectionist pastry chefs, it is a source of frustration. A perfectly baked, hollow choux shell, filled with a sublime crème pâtissière, can be utterly compromised by a glaze that is dull, streaked, or marred by a single fingerprint. The common advice—to achieve the “right consistency” or “dip it quickly”—is imprecise and insufficient for the demands of a luxury boutique or a palace hotel, where every single piece must be a flawless jewel.
The pursuit of perfection often leads chefs down a rabbit hole of traditional fondants, makeshift tools, and inconsistent results. We are told it’s about “feel” and “practice.” But what if the secret wasn’t in the wrist action of the dip, but in the grams and degrees measured long before the éclair even approaches the glaze? What if the solution lies not in artistry alone, but in a rigorous, scientific methodology that controls every variable? This is the philosophy of modern patisserie: engineering a predictable, perfect outcome every single time.
This guide moves beyond the platitudes. We will deconstruct the entire process, treating the éclair not as a simple pastry, but as a system of interconnected components. By applying principles of thermal dynamics, moisture migration, and crystallization, we will build a repeatable workflow for a perfect, mirror-like glaze—one that sets flawlessly, resists fingerprints, and elevates your creation to a work of art.
This article provides a structured path to mastering the flawless éclair. Below is a summary of the key stages we will explore, each designed to build upon the last and instill a mindset of absolute precision in your craft.
Summary: A Scientific Approach to Perfect Éclair Glazing
- Why Weighing Each Éclair Is the Secret to Uniformity?
- Fondant vs. Ganache Glaze: Which Is More Modern?
- How to Place Chocolate Plaques Before the Glaze Sets?
- The Filling Mistake That Makes Choux Pastry Soggy in 2 Hours
- Tube vs. Open Face: Which Presentation Maximizes Toppings?
- How to Keep Choux Pastry Crisp Even Inside a Fridge?
- How to Achieve Mirror-Like Shine on Your Molded Bonbons?
- Cocoa Butter Spray: Is It Necessary for Daily Production?
Why Weighing Each Éclair Is the Secret to Uniformity?
In a high-end production environment, uniformity is not an aesthetic preference; it is a technical necessity. While visual guides for piping are a starting point, they fail to account for the most critical variable in glazing: thermal mass. An éclair that is 5 grams heavier will cool at a different rate and interact with a warm glaze differently than its lighter counterpart. This minute difference is the root cause of inconsistent shine, setting times, and glaze thickness across a single batch. Weighing each éclair shell before and after baking is the only way to guarantee identical thermal properties.
Case Study: The Impact of Weight-Based Quality Control
To quantify this, consider a professional pastry training center’s findings. A documented study showed that students who implemented a strict weight-based protocol achieved 95% uniformity in their finished éclairs, compared to a mere 60% for those relying on visual inspection alone. The study underscored that consistent weight leads to uniform thermal mass, which is crucial for ensuring every éclair shell interacts with a warm glaze within the optimal 35-38°C temperature window for the exact same duration.
This level of control eliminates the guesswork. It transforms glazing from a chaotic, piece-by-piece struggle into a streamlined, predictable process where every éclair behaves identically. This is the foundational secret to a flawless batch.
Action Plan: The 5-Step Professional Éclair Weighing Protocol
- Pipe all éclair shells using a template guide, ensuring a consistent length (e.g., 4 inches) and width (e.g., 1 inch).
- Weigh each piped, unbaked shell. A standard éclair shell should have a target weight of 25-30g.
- Remove and re-pipe any shells that deviate by more than 2g from the target weight. This is a non-negotiable quality gate.
- Record the weights to track your own piping consistency and adjust pressure or technique for future batches.
- After baking, weigh the shells again. A properly baked and dried shell should lose 30-35% of its initial weight.
Fondant vs. Ganache Glaze: Which Is More Modern?
The choice of glaze is a defining statement about your pastry’s identity. For decades, traditional sugar fondant was the standard, prized for its shelf stability and classic, porcelain-like shine. However, the modern palate, and by extension modern patisserie, has evolved. The trend is a decisive shift away from pure, one-dimensional sweetness towards complexity, texture, and the authentic flavor of the core ingredients. This is where a perfectly formulated ganache glaze excels.
A ganache glaze, when correctly emulsified and used at the precise temperature, offers a deep, luxurious shine with a velvety texture that fondant cannot replicate. Its flavor profile is richer and more aligned with high-quality chocolate, making it feel distinctly more contemporary. The visual difference is stark: fondant is a hard, reflective shell, while ganache is a soft, luscious coating.
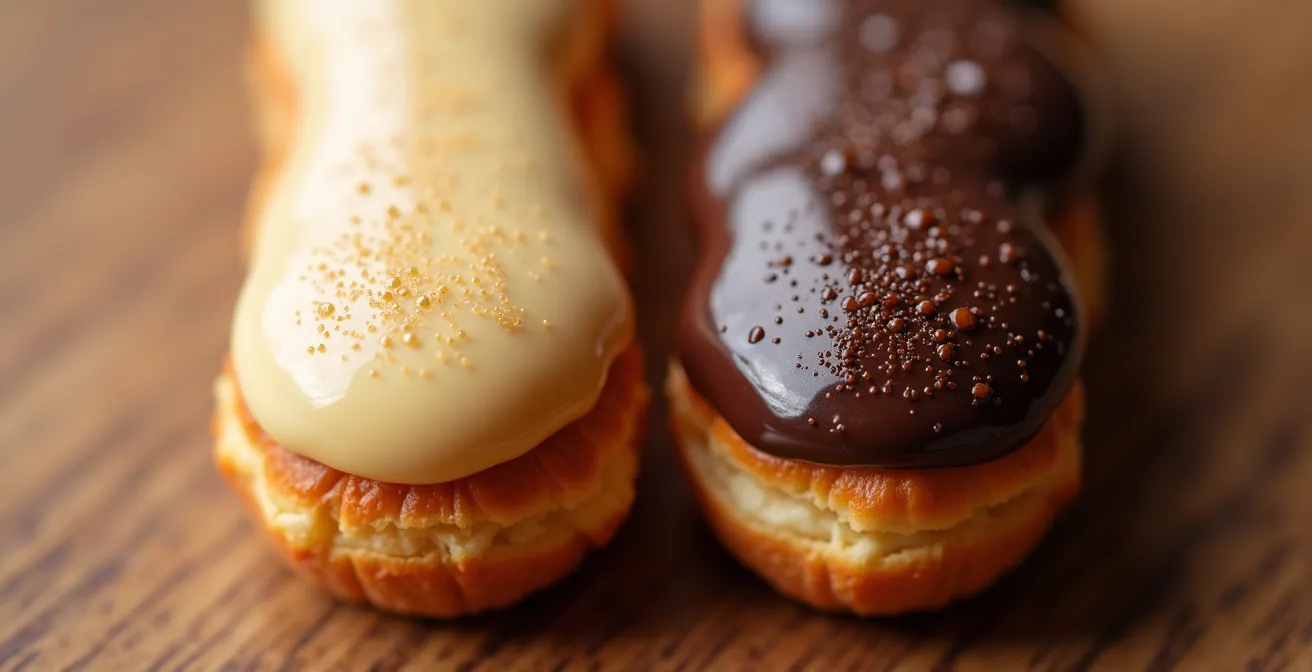
While fondant offers superior fingerprint resistance and longer shelf stability, its high sugar content often overpowers the delicate notes of the filling. A modern ganache, or even a hybrid glaze that incorporates elements like gelatin or glucose for stability, strikes a balance between visual appeal, flavor, and practicality. The following table breaks down the performance metrics for a professional setting.
| Performance Metric | Fondant Glaze | Ganache Glaze | Hybrid Glaze |
|---|---|---|---|
| Fingerprint Resistance | Excellent (9/10) | Moderate (5/10) | Very Good (8/10) |
| Depth of Flavor | Light (4/10) | Rich (9/10) | Balanced (7/10) |
| Shelf Stability | 3-4 days | 1-2 days | 2-3 days |
| Working Temperature | 28-30°C | 35-38°C | 32-35°C |
| Modern Appeal | Classic | Contemporary | Cutting-edge |
As one of the leading voices in modern pastry, Chef Matt Adlard, notes in his work on professional techniques, this shift is consumer-driven:
The modern pastry trend is moving away from pure sweetness toward complex flavor profiles. A perfectly emulsified ganache offers a more luxurious, less sugary shine that’s perceived as more contemporary than traditional fondant.
– Chef Matt Adlard, Professional Pastry Techniques
How to Place Chocolate Plaques Before the Glaze Sets?
The placement of a delicate chocolate decoration, such as a logo plaque or a fine curl, is the final touch that signifies luxury. This action, however, occurs within an incredibly brief and unforgiving window of time. Place it too early, and the plaque sinks or slides. Place it too late, and it fails to adhere, looking amateurish and detached. The key is to master the “tack window”—the precise moment when the glaze has set just enough to support the decoration but is still tacky enough to bond with it.
For a typical ganache glaze, this window is vanishingly small. Professional pastry chefs have identified that this critical period lasts for a mere 60-90 seconds when the glaze is at 35°C. Success requires not just speed, but a prepared, methodical approach using the right tools. Your chocolate plaques must be at room temperature (20-22°C) to prevent thermal shock, which can cause condensation and mar the glaze’s shine. The placement itself should be tool-assisted to avoid the heat and pressure of fingertips.
A flawless execution demands a specific, rehearsed protocol. The following steps, adapted from professional practice, eliminate variables and ensure clean, precise placement every time.
- Prepare Your Tools: Pre-warm a fine-tipped offset spatula or tweezer in warm water (approx. 40°C) and dry it completely. A cold tool will instantly set the spot it touches.
- Temper Your Plaques: Bring chocolate decorations to an exact room temperature of 20-22°C at least 30 minutes before you begin glazing.
- Test for Tackiness: Immediately after dipping an éclair, use a clean, silicone-tipped tool (like a probe thermometer cover) to gently touch an inconspicuous spot. The glaze should leave a slight indentation that slowly fills back in. This is the perfect tack.
- Execute the Placement: Using tweezers, hover the plaque 1mm above the surface to position it visually. Then, use the clean offset spatula to gently press the center of the plaque, bonding it to the glaze.
- Use Adhesive for Heavy Pieces: For any decoration weighing more than 2g, apply a microscopic dot of tempered chocolate to its base with a toothpick before placement. This acts as a powerful, invisible adhesive.
The Filling Mistake That Makes Choux Pastry Soggy in 2 Hours
The cardinal sin of éclair creation is a soggy shell. A crisp, delicate choux pastry can devolve into a soft, disappointing mess in a matter of hours, and the culprit is almost always moisture migration from the filling. Most crème pâtissière has a high water content. Through osmosis, this water inevitably seeps into the dry, porous structure of the baked choux. The scientific measure for this is water activity (Aw), and professional standards dictate that to prevent rapid sogginess, a filling should have an Aw below 0.85. While adjusting recipes can help, the most effective solution is a physical barrier.
The most elegant and flavor-neutral solution is to create an ultra-thin, waterproof lining inside the baked and cooled choux shell. This is achieved by coating the interior with a micro-thin layer of melted cocoa butter. This method, invisible to the customer, acts as a hygroscopic barrier, effectively sealing the pastry and dramatically slowing moisture migration from the filling.
Case Study: The Power of a Cocoa Butter Barrier
The effectiveness of this technique is not theoretical. A comparative test demonstrated its remarkable impact: éclairs where the shells were treated with a thin cocoa butter barrier maintained their crispness for a full 72 hours under refrigeration. In stark contrast, the untreated shells became unpleasantly soft in just 4 hours. The optimal method involved applying a micro-thin layer (approximately 0.1mm) of melted cocoa butter at 45°C to the interior of the cooled shells, creating a perfect, flavorless waterproof seal.
This single step transforms the shelf life and textural integrity of your product. It is the difference between an éclair that must be sold within hours and one that retains its intended texture for days, a crucial advantage in a professional production schedule.
Tube vs. Open Face: Which Presentation Maximizes Toppings?
Beyond the glaze itself, the form of the éclair dictates its personality and capacity for decoration. The two dominant styles in modern patisserie are the classic “Tube” and the contemporary “Open Face.” The choice between them is a strategic one, impacting everything from production workflow to the final customer experience. Neither is inherently superior, but each serves a different artistic and practical purpose.
The classic Tube is the traditional, fully enclosed éclair. Its presentation is an exercise in minimalism and perfection. The focus is entirely on a single, flawless, uninterrupted glazed surface. This style is a testament to pure technical skill, as any imperfection in the glaze is immediately visible. It is best suited for showcasing a mirror shine, a subtle cocoa butter velvet effect, or a single, elegant piece of decoration like a small chocolate plaque. It communicates confidence and classicism.
The Open Face, or “éclair-bar,” involves slicing the choux shell in half horizontally and piping the filling decoratively on the bottom half, leaving it exposed. The top half is glazed separately and often placed artfully on top. This presentation is about abundance and textural layering. The glaze becomes one of many visible components, alongside the piped cream, fresh fruit, nuts, or crunchy elements. It allows for more complex and voluminous toppings, creating a visually dynamic and texturally exciting experience. It is a canvas for creativity and communicates a more rustic, generous, or deconstructed aesthetic.
As author and pastry expert Erin Jeanne McDowell articulates, the choice is philosophical:
The classic ‘Tube’ focuses on the perfection of a single, flawless glazed surface – a testament to technical skill. The ‘Open Face’ is about textural layering, where the glaze is one of many visible components, not the star.
– Erin Jeanne McDowell, Bake It Up a Notch Column
How to Keep Choux Pastry Crisp Even Inside a Fridge?
The battle for a crisp choux pastry is fought on two fronts: internal moisture from the filling (which we’ve addressed with a cocoa butter barrier) and external moisture from the environment, especially the high humidity of a refrigerator. Even an unfilled shell will lose its crispness if not stored correctly. The solution requires a two-pronged approach: maximizing the initial dryness of the shell and protecting it from ambient humidity.
First, the choice of flour is foundational. While all-purpose flour works, high-protein bread flour provides a more robust structure that is less susceptible to moisture. Using a flour with a protein content of around 12% creates a stronger gluten network that holds up better over time. Second, the baking process itself must be optimized for dehydration. This is achieved with a “double bake” method, where the shells are returned to a low-temperature oven after the initial bake to drive off any residual internal moisture, rendering them exceptionally dry and crisp.
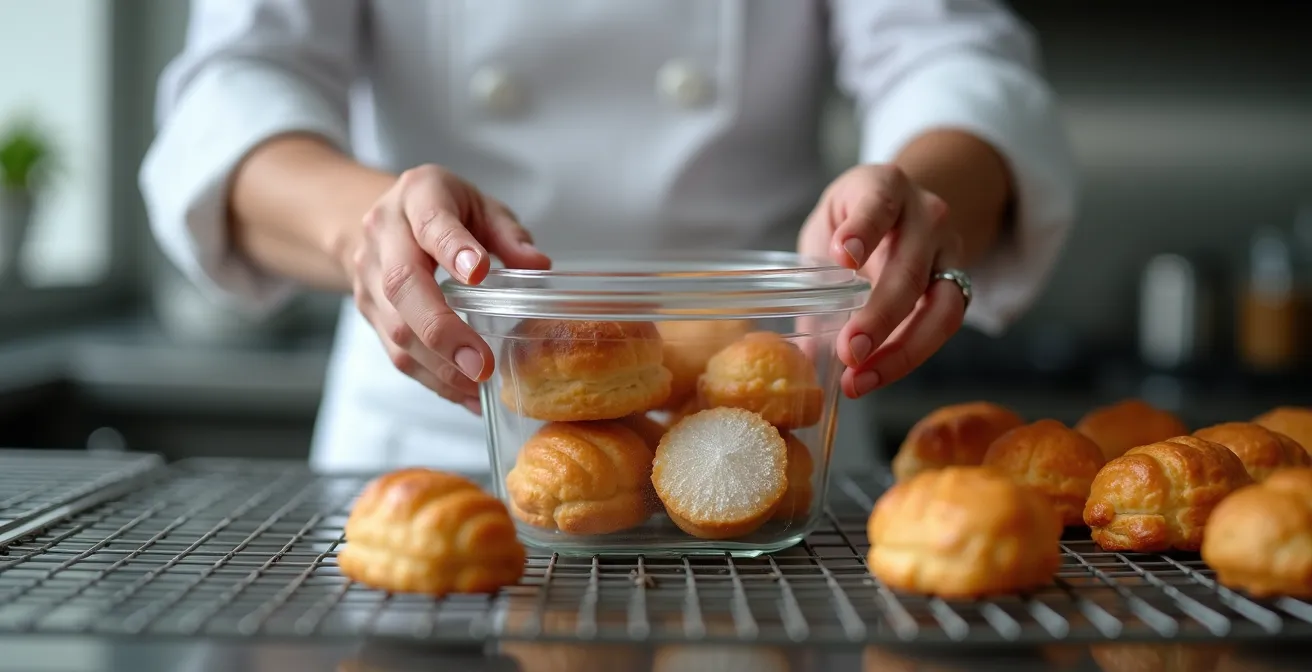
Once perfectly dehydrated, the shells must be protected. Storing them in a truly airtight container is non-negotiable. To actively combat any trapped humidity, the inclusion of food-safe silica gel packets is a standard professional practice. These desiccant packs act as a moisture sink, keeping the environment inside the container perfectly arid.
This multi-step dehydration and storage protocol is the key to producing choux shells that can be prepared in advance without sacrificing their signature crisp texture.
- Initial Bake: Complete the primary bake at a high temperature (e.g., 190°C) for 25-30 minutes until the shells are golden brown and well-risen.
- Cool Completely: Remove shells from the oven and let them cool completely on a wire rack for at least 30 minutes. Trapped steam is a primary cause of sogginess.
- Dehydration Bake: Return the cooled shells to an oven set to a very low temperature (90°C / 200°F) for 15-20 minutes, leaving the oven door slightly ajar to allow moisture to escape.
- Protective Storage: Store the double-baked, completely cooled shells in an airtight container with 2-3 food-safe silica gel packets.
- Re-Crisping (Optional): If storing for extended periods or freezing, you can reheat shells directly from the freezer or container in a 160°C oven for 2-3 minutes to restore maximum crispness before filling.
How to Achieve Mirror-Like Shine on Your Molded Bonbons?
While an éclair is not a molded bonbon, the principles that govern a chocolatier’s pursuit of a flawless, mirror-like shine are directly applicable to the art of glazing. The secret to an impeccable shine on any chocolate surface, whether cast or coated, lies in two areas: the perfection of the surface it sets against and the absolute precision of its crystalline structure. Lessons from high-end chocolaterie can elevate your glazing technique.
First, chocolate perfectly replicates the surface it is cast upon. A mirror-shine bonbon is the result of chocolate setting against an optically perfect, microscopically smooth polycarbonate mold. The same principle applies to an éclair: your glaze can only be as smooth as the choux pastry beneath it. A lumpy, uneven, or poorly baked shell will translate into a dull, imperfect glaze. This reinforces the importance of a perfect bake and uniform shell.
Case Study: The Science of Surface Perfection
In a high-end production facility, chocolatiers demonstrated that the simple act of polishing polycarbonate molds with pure cotton wool for five minutes per cavity was transformative. Light reflectance measurements showed the resulting bonbons achieved a 95% mirror quality, compared to just 60% for those from unpolished molds. This proves that the final shine is predetermined by the quality of the contact surface.
Second, the shine itself is a visual manifestation of correctly tempered chocolate. Tempering is the process of encouraging cocoa butter to crystallize into its most stable form, known as Form V crystals. These crystals are small, uniform, and pack together tightly, creating a dense surface that reflects light perfectly, resulting in a high gloss, a satisfying “snap,” and contraction for easy de-molding. For dark chocolate, achieving this requires maintaining a precise working temperature. Any deviation will result in a different crystal form (or a chaotic mix), leading to a dull, streaky, or soft finish.
Key Takeaways
- Uniformity is Non-Negotiable: Weighing choux shells (25-30g) is the first step to a perfect glaze by controlling thermal mass.
- Temperature is Everything: A glaze’s working temperature (ganache at 35-38°C, fondant at 28-30°C) dictates its shine and finish.
- Moisture is the Enemy: A cocoa butter barrier and a double-bake process are essential for maintaining choux pastry crispness for up to 72 hours.
Cocoa Butter Spray: Is It Necessary for Daily Production?
In the arsenal of a modern pastry chef, the cocoa butter spray gun has evolved from a niche tool to a production workhorse. While not strictly “necessary” in the traditional sense, its utility in a high-volume, high-quality environment is undeniable. It offers solutions for speed, texture, and preservation that are difficult to achieve otherwise. For daily production, its value is best understood through its three primary applications.
As a leading review of modern pastry equipment highlights, the advantages are clear:
Cocoa butter spray provides three key advantages for modern production: creating the signature ‘velvet’ texture, speed-sealing pastries as an edible barrier, and achieving rapid, uniform color changes on set glazes.
– Professional Pastry Equipment Review, Modern Pastry Techniques
First, it is the only way to achieve the signature “velvet” texture, where atomized, tempered cocoa butter crystallizes instantly on a frozen surface. Second, it can be used to apply the previously discussed moisture-proofing barrier inside choux shells with incredible speed and evenness. Finally, it allows for rapid, uniform application of color over set glazes or chocolate, creating gradients or solid colors efficiently. The decision to integrate this tool often comes down to a cost-benefit analysis.
| Factor | Commercial Spray (PME/PCB) | DIY Airbrush System |
|---|---|---|
| Initial Cost | $15-20 per can | $150-200 equipment |
| Per-Use Cost | $0.50-0.75 | $0.10-0.15 |
| Consistency | Perfect every time | Requires practice |
| Maintenance | None | Daily cleaning required |
| Color Options | Limited pre-mixed | Unlimited custom |
| Shelf Life | 2 years sealed | Mix fresh weekly |
By integrating these advanced techniques—from the foundational principle of weighing each shell to the final flourish of a precisely placed decoration—you move beyond simply making éclairs. You begin to engineer them. This commitment to precision is the defining characteristic of palace-level patisserie. Incorporate these principles into your daily workflow to consistently produce éclairs that not only taste sublime but stand as a testament to the highest standards of the craft.