Serving 20 perfect molten cakes isn’t about a better recipe or faster baking; it’s about adopting a professional caterer’s system of orchestration.
- The key is to create a “plating assembly line” by preparing all cold components and garnishes hours in advance.
- Eliminate all guesswork by baking a single “test batch” 15 minutes before the main event to calibrate the exact baking time for your oven and batter.
Recommendation: Shift your mindset from a frantic cook to a calm service commander. Control the process, don’t let the process control you.
The scene is all too familiar. The main course was a triumph, conversation is flowing, and your guests are happy. But a knot of dread is tightening in your stomach. In the kitchen, 20 individual ramekins of chocolate potential—or disaster—await. You face the host’s ultimate challenge: serving the notoriously time-sensitive molten chocolate lava cake to a large group, all at once, without being trapped in the kitchen for the grand finale. It’s the moment that can make or break a perfect dinner party.
You’ve likely scoured the internet for solutions. The common advice feels inadequate, a collection of platitudes that don’t solve the core logistical nightmare. “Make them ahead and reheat” often results in sad, uniformly solid pucks of cake, the molten promise betrayed. “Just bake them all at once” ignores the crucial question of *when* to start, risking either cold cakes or an awkward 15-minute gap while you anxiously stare at the oven. These tips treat the symptom, not the cause of the stress.
But what if the secret wasn’t a baking trick, but a fundamental shift in approach? What if the solution lay in thinking less like a home cook and more like a professional caterer? This guide is not about another molten cake recipe. It’s about revealing the system—the art of dessert service orchestration—that allows professionals to serve hundreds of flawless dishes without breaking a sweat. It’s a method built on preparation, timing, and control, designed to give you back your party.
We will deconstruct the professional process, transforming your kitchen from a zone of panic into a streamlined station. From strategic portioning and pre-plating to mastering the final, perfectly-timed bake, you’ll learn the techniques to execute this ambitious dessert with the cool confidence of a seasoned chef.
Summary: The Caterer’s System for Flawless Group Dessert Service
- Plated Dessert vs. Buffet: Which Reduces Waste for 50 People?
- How to Pre-Plate Chocolate Desserts 4 Hours Before Service?
- The Gluten-Free Option: One Dessert for All or a Separate Dish?
- The Display Mistake That Ruins Dessert Buffets in Summer
- How Much Chocolate Per Person After a Heavy 3-Course Meal?
- How to Calculate Chocolate Quantities for a 200-Person Wedding?
- How to Time the Baking of Lava Cakes to the Exact Second?
- Why Bite-Sized Bonbons Are Better Than Cake Slices for Dancing Guests?
Plated Dessert vs. Buffet: Which Reduces Waste for 50 People?
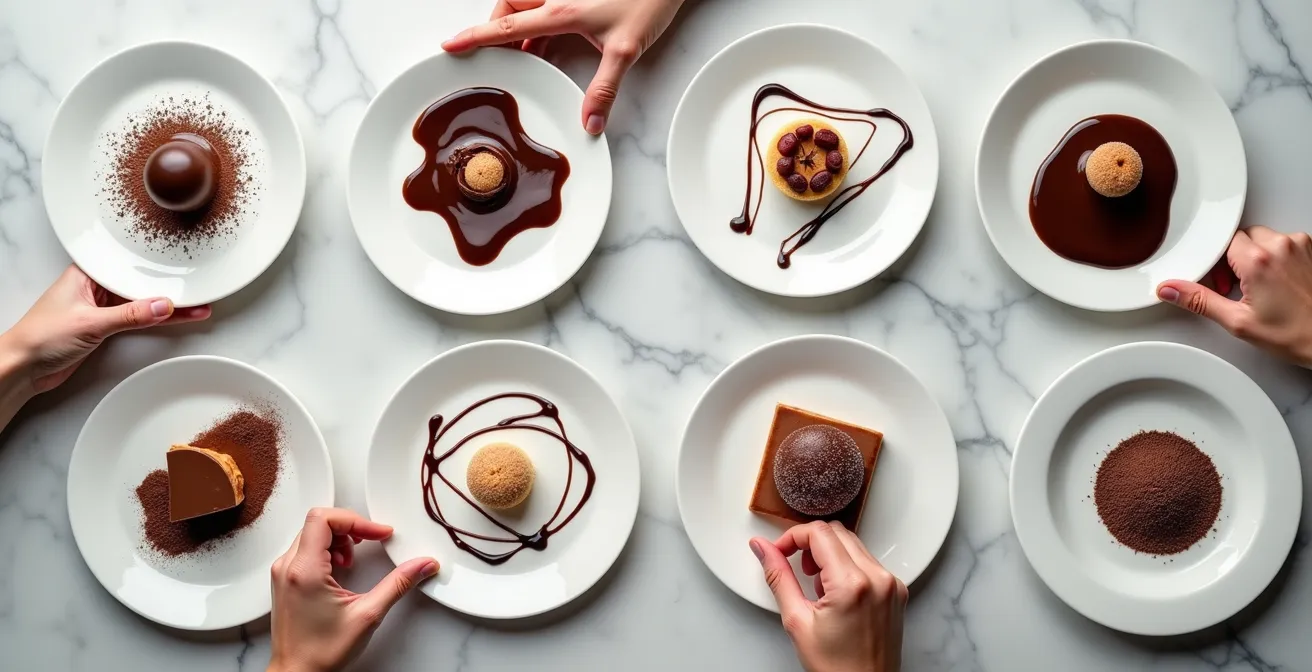
The first strategic decision in your dessert orchestration is the service format. For a large group, the choice between a plated dessert and a buffet seems like a toss-up between elegance and variety. However, from a waste and logistics perspective, the answer is clearer. A buffet, with its multiple options, often leads to guests taking a little of everything, resulting in significant leftovers and complicated inventory. While a hybrid model can work for huge events like weddings by offering 3-4 mini-desserts per person, this adds complexity for a home host.
For a sit-down dinner of 20, 50, or even 100, the plated dessert is your greatest ally in control and waste reduction. It allows you to execute one item perfectly and manage portions with precision. You aren’t guessing how many people will choose the cheesecake over the brownies; you know exactly how many molten cakes you need. This singular focus is the foundation of a stress-free service.
The professional standard for a plated dessert after a full meal is not as large as you might think. In fact, many catering professionals recommend planning for one modest slice of cake or two smaller servings per guest. By committing to a single, perfectly portioned plated dessert, you eliminate guesswork, streamline your prep, and drastically reduce the potential for food waste. It’s the first step in taking command of the process.
How to Pre-Plate Chocolate Desserts 4 Hours Before Service?
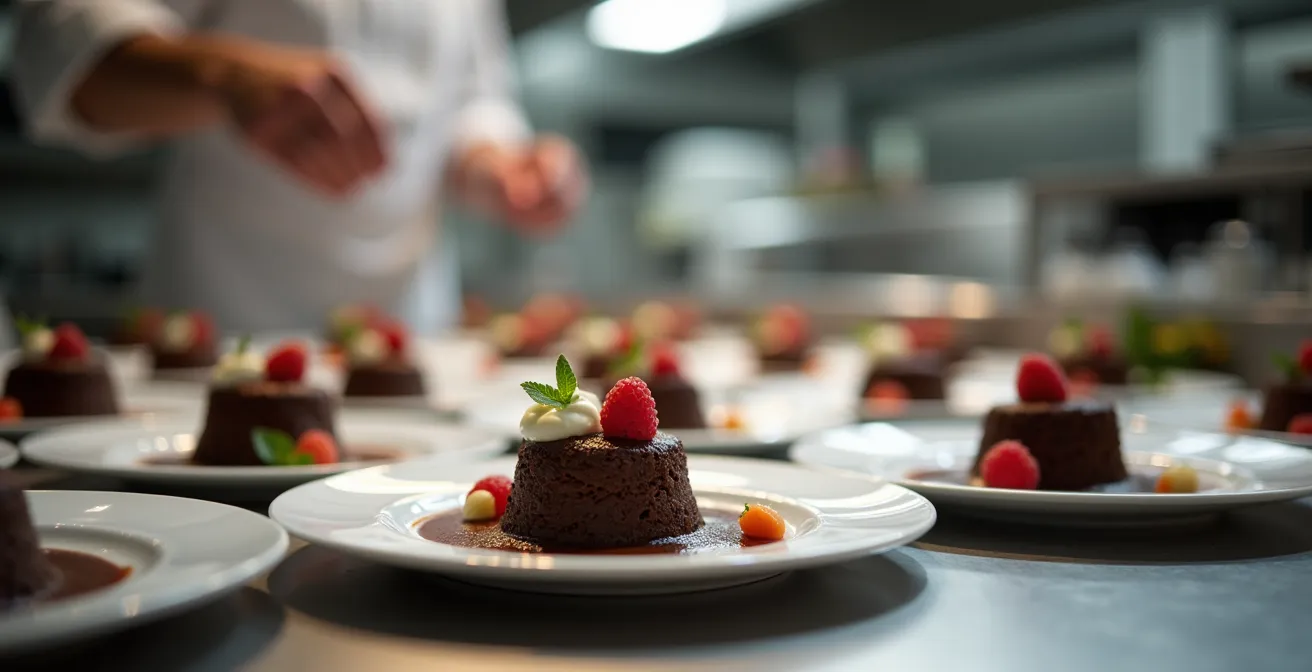
Here is the core secret of professional catering: the event itself is just the final 1% of the work. The real magic happens hours before, in a process of methodical preparation known as “mise en place.” For your molten cakes, this translates to creating a “plating assembly line” where everything *except* the hot cake is ready to go long before your guests even think about dessert. Your goal is to have 20 plates, each a work of art in progress, waiting for their star performer.
This isn’t about just setting out plates. It’s about strategically placing every cold and room-temperature component. The chocolate sauce “swoosh,” the sprinkle of cocoa powder, the scoop of ice cream (pre-scooped and held in the freezer on a tray), and the berry garnish can all be pre-positioned. By doing this, the final service becomes a simple, two-step action: place the hot cake, add the final touch (like a mint leaf), and send it out. This transforms a chaotic 15-minute scramble into a calm, 60-second assembly job per plate.
This level of advance preparation requires knowing how to stage each component correctly to maintain its quality. A sauce might need a touch of corn syrup to prevent a skin from forming, while a crumble base must be kept in an airtight container. The following table, based on professional kitchen practices, is your blueprint for a flawless plating assembly line.
By mastering this staging, you are effectively time-traveling, completing the most finicky parts of your job when the kitchen is calm. The principles in this guide for temperature staging are what separate amateur scrambling from professional execution.
| Component | Storage Method | Timing | Notes |
|---|---|---|---|
| Chocolate sauce swooshes | Room temperature | Up to 4 hours | Add corn syrup or butter to prevent skinning |
| Crumble bases | Room temperature | Up to 6 hours | Keep in airtight container until plating |
| Mousses/custards | Refrigerated in molds | Until service | Unmold just before serving |
| Ice cream quenelles | Freezer on tray | Pre-scooped up to 2 days | Cover with plastic wrap |
| Cake batters | Refrigerated | Up to 2 days | Add 45-60 seconds baking time per hour chilled |
The Gluten-Free Option: One Dessert for All or a Separate Dish?
In today’s hosting environment, accounting for dietary restrictions is non-negotiable. The question for the orchestrating host is one of efficiency: do you create a separate, special dish for a few guests, or do you design a single, spectacular dessert that everyone can enjoy? While it might seem easier to buy a gluten-free alternative for one or two people, this introduces a new variable and complexity into your tightly controlled system. You now have two different desserts to track, plate, and serve.
The truly professional move is to embrace the “one dessert for all” philosophy. Many modern, high-end chocolate desserts are naturally gluten-free or can be easily adapted without sacrificing quality. A flourless chocolate torte or a molten cake made with a high-quality gluten-free flour blend will be indistinguishable to the average palate but universally accommodating. This approach is the epitome of smart orchestration: it simplifies your workload, eliminates the risk of cross-contamination during a hectic service, and makes all your guests feel equally considered.
This trend towards inclusive menus is now standard in professional catering. In fact, many leading NYC caterers now offer seasonal dessert menus with dietary restrictions clearly and elegantly integrated, rather than treated as an afterthought. By choosing a single, delicious, and secretly gluten-free molten cake recipe, you are not cutting corners; you are operating at the highest level of hosting efficiency and thoughtfulness. It’s one less thing to worry about during the final countdown.
The Display Mistake That Ruins Dessert Buffets in Summer
While our focus is on a plated molten cake, the principles of temperature control are universal, especially if you opt for a buffet or have components of your dessert sitting out. The single biggest mistake, particularly in summer or a warm room, is underestimating ambient heat. A beautiful display of chocolate-dipped strawberries or delicate mousses can turn into a sad, melted puddle in under 30 minutes. The enemy is time and temperature.
Professionals combat this with a multi-pronged strategy. It’s not just about one trick, but a system of cooling. This includes using naturally cold surfaces like frozen granite or marble slabs, which act as a heat sink. Another technique is creating hidden ice baths by nesting display platters within larger bowls of ice. Even the flow of your buffet line matters; temperature-sensitive items should always be placed at the end, minimizing their time out of refrigeration. For decorations, using compound chocolates with higher melting points can also provide a crucial buffer.
This systematic approach to cooling is how caterers execute flawless outdoor events in the peak of summer, and it’s a perfect example of professional problem-solving.
Case Study: Rich’s Catering’s Tiered Cooling Strategy
To manage outdoor summer events, Rich’s Catering implements a tiered approach to dessert displays. They place sturdy items like cookies and brownies at room temperature. For more delicate items like mousses and creams, they use chilled display platters that are rotated with fresh, cold ones every 30 minutes. Most importantly, fragile elements like chocolate decorations are timed meticulously, placed on the display just moments before guests arrive, preventing any chance of blooming or melting and ensuring a perfect presentation.
Even for your plated dessert, this is a crucial lesson. Your pre-scooped ice cream must stay in the coldest part of the freezer, and your chilled plates must be kept away from the heat of the oven. Every element of your environment must be considered part of your orchestrated service.
How Much Chocolate Per Person After a Heavy 3-Course Meal?
One of the most common mistakes in home entertaining is over-portioning dessert. After a rich, multi-course meal, your guests’ appetites are significantly diminished. While their eyes may say “yes” to a giant slice of cake, their stomachs will protest. This is where “portion psychology” comes in. A smaller, more intense, and beautifully presented dessert often feels more luxurious and satisfying than a large, overwhelming one. For a decadent dessert like a molten chocolate cake, less is truly more.
Catering professionals have this down to a science. After a heavy main course like steak or creamy pasta, the dessert portion is often dramatically reduced. In fact, some professional caterers suggest a 50% portion reduction for sweets served after a particularly heavy meal. Serving a 50-70g (2-2.5 oz) molten cake is not being stingy; it’s being sophisticated. It’s a perfectly pitched final note that leaves guests delighted, not overstuffed. This smaller portion size also has the practical benefit of baking faster and more evenly.
The type of chocolate and the richness of the main course are intrinsically linked. A heavy meal pairs best with a smaller portion of intense, dark chocolate (70% or higher) to cut through the richness. A lighter meal, on the other hand, allows for a slightly larger portion or a sweeter milk chocolate. This nuanced approach ensures the entire dining experience is balanced from start to finish.
The following matrix is a tool used by bakers to perfectly calibrate dessert portions, ensuring the final course is a welcome crescendo, not an overwhelming burden. This data from a specialized baking calculator provides a clear framework.
| Main Course Type | Recommended Dessert Portion | Chocolate Type |
|---|---|---|
| Heavy/Creamy (pasta, steak) | 50-70g | Dark chocolate 70%+ |
| Moderate (chicken, pork) | 70-90g | Mixed dark/milk |
| Light (fish, salad) | 80-100g | Any preference |
| Vegetarian/Vegan | 75-95g | Variety recommended |
How to Calculate Chocolate Quantities for a 200-Person Wedding?
While your dinner party for 20 may not be a 200-person wedding, the underlying calculation principles for large-scale events provide an invaluable safety net. The professional formula for calculating quantities isn’t just a simple multiplication; it involves strategic buffers and subtractions. Amateurs buy for the number of invites; pros plan for the reality of consumption.
The core formula is straightforward: (Number of Guests × Portion Size). However, the crucial additions are what make it professional. First, a 10-15% buffer is added to the total ingredients. This buffer isn’t for extra guests; it’s to cover minor spills, measurement errors, or a small batch that doesn’t turn out right. It’s an insurance policy against kitchen mishaps.
Second, and counter-intuitively, professionals often subtract a small percentage (5-10%) to account for “no-dessert guests.” In any large group, there will always be individuals who skip the final course for various reasons. For a 200-person wedding, this means realistically planning for 180-190 actual dessert eaters. Finally, buying in bulk, such as 5kg+ blocks of chocolate, offers significant cost savings and ensures consistency across the entire batch.
Applying this logic to your party of 20: if your portion is 70g, you need 1400g of chocolate. Adding a 15% buffer brings your shopping list to 1610g. You know you’ll likely only serve 18-19 cakes, but you are fully prepared for 20, with a built-in margin for error.
Your Caterer’s Calculation Checklist
- Base Calculation: Determine your total need by multiplying the number of guests by your target portion size (e.g., 20 guests x 70g = 1400g).
- Add a Buffer: Add a 10-15% buffer to your base calculation for insurance against kitchen errors (1400g + 15% = 1610g).
- Estimate Consumption: For very large groups, consider subtracting 5-10% to account for guests who will skip dessert, but for a group of 20, it’s safer to plan for everyone.
- Buy Smart: Purchase ingredients in the largest practical bulk size to ensure consistency and cost-effectiveness.
- Account for Yield: Remember that different types of chocolate have different densities and yields. 1kg of 70% dark chocolate behaves differently than 1kg of 35% milk chocolate.
How to Time the Baking of Lava Cakes to the Exact Second?
This is the moment of truth. All the preparation, portioning, and pre-plating lead to this single, critical event: the bake. With molten cakes, the difference between a liquid-gold center and a dry, overcooked cake is often less than 60 seconds. When you’re cooking 20 at once in a home oven, which can have hot spots and temperature fluctuations, how can you possibly guarantee perfection? The answer is not a prayer or a guess. It’s the “Test Batch Principle.”
Just as software engineers run a small test before deploying a major update, you will bake a single “scout” cake from the same batter, 15 minutes before the main batch is scheduled to go in. This single cake is your data source. It will tell you *exactly* how your specific batter, in your specific ramekins, is behaving in your specific oven today. It removes all variables and all guesswork. You watch this one cake like a hawk, looking for the visual cues: the edges are firm and dry, the center still has a slight jiggle, and there’s about a 1-inch shiny circle in the middle. When it’s perfect, you note the time. That is now your non-negotiable baking time for the main batch.
Remember to adjust for variables. As a rule, you should add about 45-60 seconds to the baking time for every hour the batter has been refrigerated. Ramekin size is also a huge factor; a small 4 oz ramekin might need 8-10 minutes, while a large 8 oz version could require 12-14 minutes to achieve the same result. An accurate guide to baking time adjustments is essential. The test batch calibrates all of this for you in real-time, making it the most powerful tool in your timing arsenal.
Your Pre-Service Timing Audit
- Calibrate Oven: Confirm your oven is fully preheated to the target temperature (e.g., 450°F / 232°C) for at least 20 minutes.
- Deploy the “Scout”: 15 minutes before the main bake, place one “test batch” cake in the center of the oven.
- Monitor Visual Cues: Watch for the key indicators: edges set, center jiggly, and a small shiny spot remaining. Note the exact time this occurs.
- Set the Master Timer: Use the time from your scout cake as the definitive baking time for the main batch of 20.
- Ready the Assembly Line: As the main batch bakes, ensure your pre-plated components are lined up and ready for the final, swift assembly.
Key takeaways
- The secret to serving dessert for a crowd is to focus on service orchestration, not just the baking process itself.
- Create a “plating assembly line” by preparing and staging all cold dessert elements hours in advance to minimize last-minute work.
- Eliminate all baking time guesswork by using the “Test Batch Principle”: bake one scout cake 15 minutes ahead to find the perfect timing for your specific oven and batter.
Why Bite-Sized Bonbons Are Better Than Cake Slices for Dancing Guests?
Sometimes, despite the best-laid plans, a complex plated dessert like a molten cake is simply the wrong tool for the job. The final piece of professional dessert orchestration is knowing when to pivot to a more suitable format. The “right” dessert is entirely dependent on the context of your event. For a sit-down dinner, a plated molten cake is a showstopper. But for a mingling cocktail party or a wedding reception where guests are on the dance floor, it’s a logistical nightmare.
For these “high-movement” events, bite-sized, self-contained desserts are vastly superior. Think mini cheesecakes, chocolate bonbons, brownie bites, or fruit tarts. The golden rule for a mingling event is simple, as one expert puts it:
A successful mingling dessert must be consumable with one hand, requiring no cutlery, leaving the other hand free for a drink or handshake.
– Event Planning Professional, Red Tail Catering San Diego
This isn’t a compromise; it’s a strategic choice. It prioritizes the guest experience and the flow of the event over a specific culinary ambition. Offering a variety of mini-desserts also caters to diverse tastes and allows for easy portion control. In this scenario, typical allocations by event planners are for 3-4 mini desserts per person. This “dessert bar” approach encourages grazing and socializing, which a sit-down dessert actively discourages.
So, before you commit to your molten cakes, ask yourself one final question: What do I want my guests to be *doing* when they eat dessert? If the answer is “sitting and savoring,” proceed with the molten cake orchestration. If the answer is “mingling and dancing,” then your professional-level decision might be to pivot to an elegant array of bite-sized wonders.
Armed with a system of orchestration, a caterer’s mindset, and the right strategic principles, you are no longer just a cook hoping for the best. You are a commander, directing a flawless service from start to finish. You can now confidently tackle the molten cake challenge, or any ambitious dessert, and remain a calm, present host for your guests.