The secret to a dark, moist cake isn’t a single ingredient, but understanding the chemistry of cocoa powder and how its properties interact.
- Color and leavening are controlled by the cocoa’s pH level (natural vs. Dutch-process).
- Moisture is paradoxically threatened by high-fat cocoa powders due to cocoa butter’s solid state at room temperature.
Recommendation: Prioritize a cocoa powder’s pH for color and leavening, and manage fat content and sponge density for a stable, moist crumb structure.
For any baker, the quest for the perfect chocolate cake is a familiar journey. We strive for a creation that is simultaneously deeply, enticingly dark and exceptionally moist. The common advice is often a confusing mix of rules: use Dutch-process for color, add more fat for moisture, bloom it for flavor. Yet, following these tips often leads to frustrating results—a cake that’s dark but dry, or moist but pale and crumbly. This happens when we treat baking like a list of instructions instead of a science.
The truth is, achieving both goals is a delicate balancing act of chemistry. The type of cocoa powder you choose fundamentally alters your batter’s pH, its fat structure, and how starches behave. The key isn’t simply choosing one “best” powder, but understanding how to manipulate these properties to your advantage. It’s about moving beyond the recipe and becoming an architect of texture and flavor.
But what if the real secret wasn’t in adding more fat, but in understanding how that fat behaves? What if the key to a stable, moist crumb lies not just in the ingredients, but in the very structure of the sponge itself? This guide decodes the science behind cocoa powder. We will explore the critical differences in pH, the misunderstood role of fat content, and the techniques that professional bakers use to control color, intensify flavor, and build a perfectly moist cake that holds its structure, every single time.
This article provides a comprehensive roadmap for mastering cocoa powder in your baking. By exploring each aspect, from chemical properties to structural impact, you’ll gain the expertise needed to create consistently superior chocolate cakes.
Summary: Which Cocoa Powder Type Creates the Darkest, Moistest Cakes?
- Dutch-Process vs. Natural Cocoa: Why Does It Matter for Baking Soda?
- How to “Bloom” Cocoa Powder to Intensify Flavor in Batters?
- High-Fat vs. Low-Fat Powder: Which One Dries Out Your Sponge?
- The Sifting Mistake That Leaves Bitter Pockets in Your Frosting
- How to Achieve Jet-Black Color Without Artificial Dyes?
- Why High-Quality Forastero Is Essential for Structured Ganaches?
- How to Build a 3-Tier Chocolate Cake That Survives Transport?
- Why Sponge Density Matters More Than Dowels for Stability?
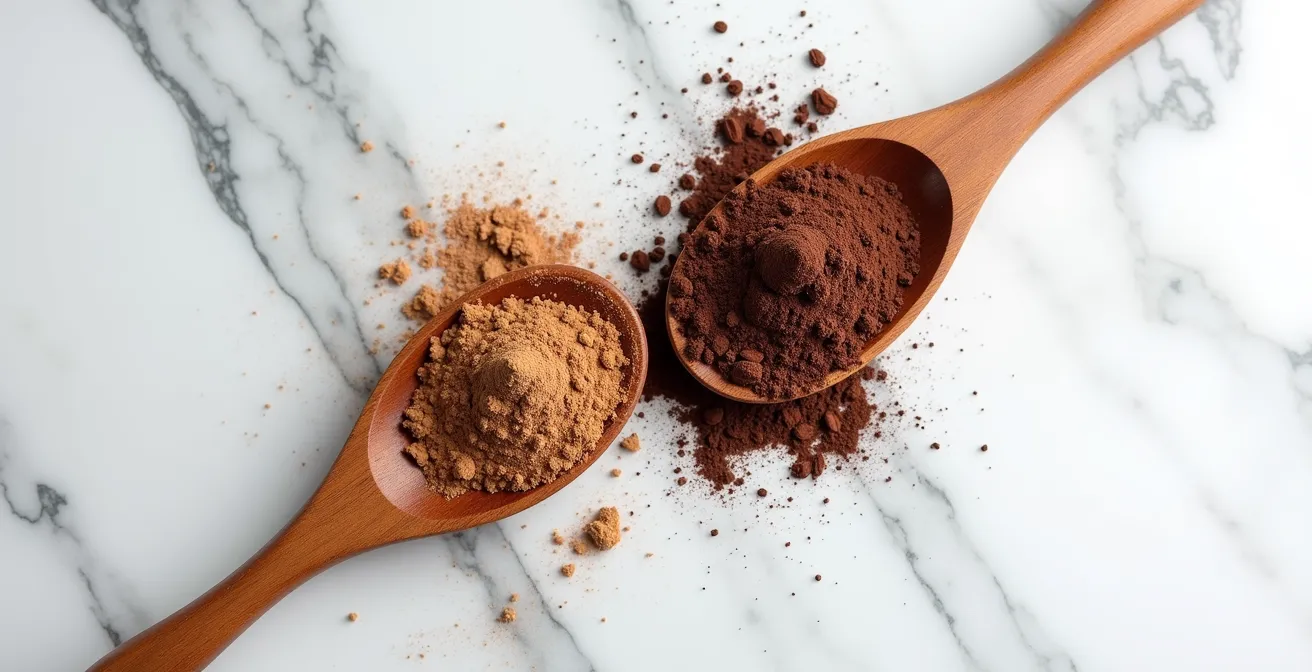
Dutch-Process vs. Natural Cocoa: Why Does It Matter for Baking Soda?
The single most important distinction in the world of cocoa powder is not its origin or brand, but its pH level. This chemical property dictates everything from color to how your cake rises. Natural cocoa powder is simply roasted, pulverized cacao beans. It is acidic, with a sharp, fruity flavor. In contrast, Dutch-process cocoa has been washed in an alkaline solution, a process called dutching, to neutralize its acidity. This results in a smoother, mellower flavor and a darker color.
This difference in acidity is critical because of its interaction with your leavening agent. Natural cocoa’s acidity reacts with baking soda (an alkali) to produce carbon dioxide gas, which makes your cake rise. If you use Dutch-process cocoa (which is neutral or alkaline) in a recipe calling for baking soda and natural cocoa, there will be no acid to activate the soda, resulting in a flat, dense cake. Conversely, recipes designed for Dutch-process cocoa typically use baking powder, a complete leavener that contains its own acid. According to baking experts, natural cocoa has a pH of 5-6, while Dutch-process is neutralized to pH 7-8, a significant chemical shift that cannot be ignored.
Understanding this relationship allows you to control both texture and color. A recipe using natural cocoa and baking soda will often have a reddish-brown hue. Switching to a Dutch-process powder and baking powder will yield a much darker, sometimes almost black, crumb. The key is to always match the cocoa’s pH to the appropriate leavener to ensure a proper rise.
This comparative table clearly outlines the functional differences between the two main types of cocoa powder, providing a quick reference for any baker.
| Property | Natural Cocoa | Dutch-Process Cocoa |
|---|---|---|
| pH Level | 5-6 (acidic) | 7-8 (neutral to alkaline) |
| Color | Light brown, reddish tint | Dark brown to black |
| Flavor | Fruity, acidic, bright | Mellow, smooth, earthy |
| Best Leavener | Baking soda | Baking powder |
| Fat Content | 10-12% | 10-24% (varies) |
How to “Bloom” Cocoa Powder to Intensify Flavor in Batters?
Beyond color and leavening, the ultimate goal is a deep, rich chocolate flavor. One of the most effective professional techniques for achieving this is “blooming” the cocoa powder. This process involves dissolving the cocoa powder in a hot liquid—such as coffee, water, or even melted butter—before adding it to the rest of your ingredients. While it may seem like a simple extra step, the science behind it is profound. It fundamentally changes how the flavor of the cocoa is perceived in the final bake.
This technique works in two ways. First, the heat helps to dissolve the gritty cocoa solids more effectively, ensuring a smoother texture and preventing lumps. More importantly, it helps release the volatile aromatic compounds trapped within the cocoa powder. These compounds are responsible for the complex, nuanced notes of chocolate. By blooming the powder, you are essentially “waking up” these flavors, making them more available and prominent in the batter. The result is a finished product with a noticeably more intense and well-rounded chocolate taste than one where the powder was simply mixed in dry.
This macro photograph shows the exact moment of transformation, as the hot liquid dissolves the cocoa solids and begins to unlock its deep flavor and color.
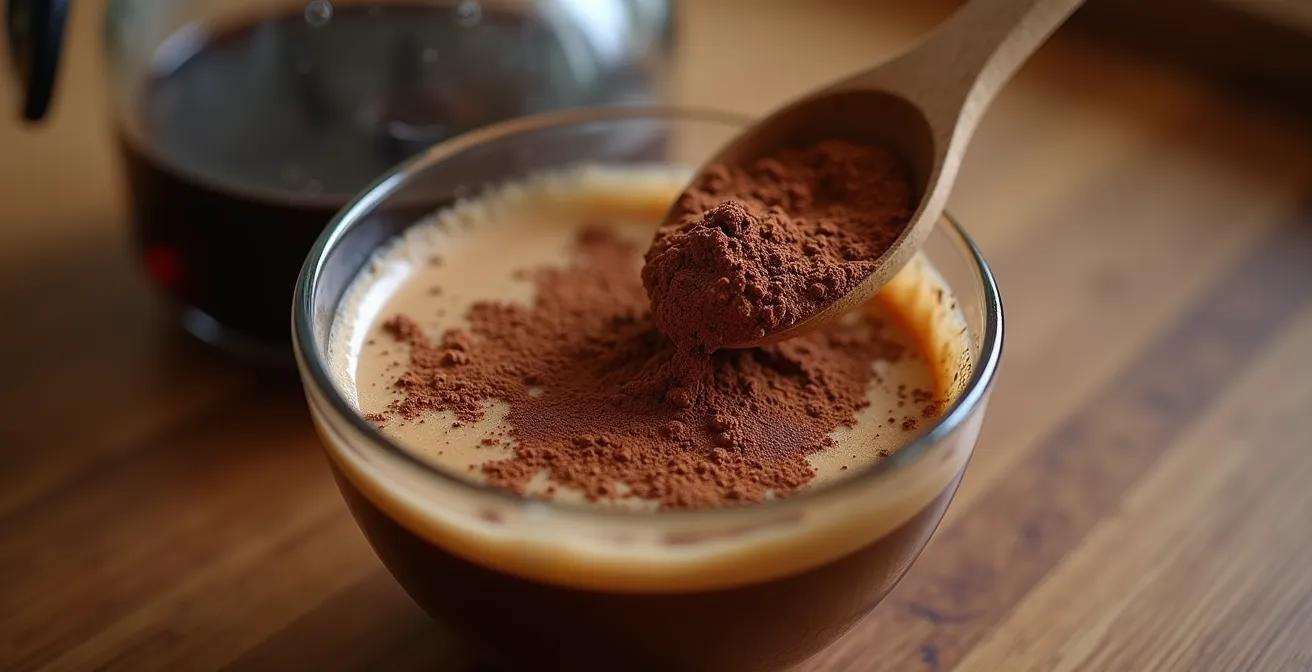
As noted by baking experts, this technique is particularly effective with high-fat Dutch-process cocoa. The warm liquid or fat helps to emulsify the cocoa’s own fat content, creating a richer, more fudgy intensity. For any recipe, from cakes to frostings, taking a few minutes to bloom your cocoa is one of the highest-impact changes you can make to elevate the final flavor profile from good to extraordinary.
High-Fat vs. Low-Fat Powder: Which One Dries Out Your Sponge?
It’s a common and logical assumption: more fat equals more moisture. When it comes to cocoa powder, however, this logic is dangerously flawed. The pursuit of a moist cake can be sabotaged by choosing a powder with a very high fat content, a paradox rooted in the unique properties of cocoa butter. Unlike liquid oils, cocoa butter is a hard, brittle fat at room temperature. This is what gives a quality chocolate bar its satisfying “snap.”
While standard cocoa powders have a fat content of 10-12%, premium and some Dutch-process varieties can contain up to 22-24% fat. Comprehensive research shows cocoa powder fat content ranges from 10-24%, and this variation is critical. When this extra cocoa butter is incorporated into a cake batter, it melts beautifully in the oven. The problem arises as the cake cools. The cocoa butter recrystallizes, returning to its solid, firm state. This process of fat crystallization can bind moisture and create a texture that feels firm, dense, and even dry on the palate, rather than soft and tender.
This is precisely why many professional bakers prefer a lower-fat (10-12%) cocoa powder for cakes where a light, springy crumb is desired. The flavor is still potent, but the structure is not weighed down or hardened by excess solid fat. As the team at King Arthur Baking explains, this property is a liability in many cakes:
Although cocoa butter provides luxurious texture in the best chocolate bars, and perhaps in gooey, rich flourless chocolate cakes, it can be a liability in a cake with plenty of flour that is meant to have an actual crumb. Once cool, a butter cake made with chocolate can feel hard and sometimes even dry on the palate because cocoa butter is harder at room temperature (and even harder when cold) than butter or oil.
– King Arthur Baking Team, King Arthur Baking Blog
Therefore, to ensure a moist crumb, don’t just look at the fat percentage. Consider the role of that fat. For a truly tender sponge, a lower-fat cocoa powder combined with liquid fats like oil or melted butter is often the superior formula.
The Sifting Mistake That Leaves Bitter Pockets in Your Frosting
Every baker has been told to sift cocoa powder. It’s a standard instruction, often followed without much thought. But the reason goes far beyond simply “preventing lumps.” Cocoa powder is hygroscopic, meaning it readily absorbs moisture from the air. This causes particles to clump together into dense, stubborn pockets. In a cake batter, these might dissolve during baking. In a frosting, however, they have nowhere to hide.
Failing to properly disperse these clumps leaves behind tiny, intensely bitter “flavor bombs” that ruin the smooth, luxurious experience of a good buttercream or ganache. Sifting is the first line of defense, breaking up the largest clumps. But for a truly flawless result, the best technique is to create a cocoa slurry. This involves mixing the cocoa powder with a small amount of warm liquid (like cream or milk) or melted fat (like butter) to form a thick, smooth paste *before* adding it to the main frosting base. This ensures every single particle is hydrated and dissolved.
This method guarantees complete emulsification and distribution. When the cocoa slurry is added to the butter and sugar, there are no dry particles left to form clumps. The result is a frosting with a perfectly uniform color and a deep, seamless chocolate flavor, free from any unpleasant, bitter surprises. It’s a non-negotiable step for achieving professional-quality results.
Action Plan: Achieving Clump-Free Frosting
- Sift First: Always sift cocoa powder through a fine-mesh sieve to break up initial static-bound clumps.
- Create a Slurry: In a separate bowl, mix the sifted cocoa with a small amount of hot cream, milk, or melted butter until a smooth, thick paste forms.
- Gradual Addition: With the mixer on low, slowly add the cocoa slurry to your creamed butter and sugar base.
- Check Temperature: Ensure your butter is at a proper room temperature (around 65-68°F or 18-20°C) to allow for optimal emulsification with the cocoa paste.
- Mix Thoroughly: Once combined, continue mixing for at least 3-5 minutes to ensure the cocoa is fully distributed and the frosting is light and airy.
How to Achieve Jet-Black Color Without Artificial Dyes?
For dramatic, visually stunning desserts like “blackout” cakes or homemade Oreo-style cookies, bakers often turn to black cocoa powder. This is an ultra-Dutched cocoa that has been heavily treated with an alkalizing agent. This process raises its pH to 8 or higher, creating a product that is strikingly black in color. However, achieving this intense darkness comes with significant trade-offs in both flavor and nutritional content.
The heavy alkalization process that creates the black color also strips out much of the classic chocolate flavor. Black cocoa has a very mellow, almost non-existent chocolate taste, often described as ashy or simply “Oreo-like.” It provides color, but not much flavor. Furthermore, the process significantly diminishes the flavanols (antioxidants) naturally present in cacao. While this may not be a primary concern for a dessert, studies have shown that up to 90% of natural cocoa’s antioxidants can be destroyed by heavy dutching. This is a stark reminder of the chemical transformation the product undergoes.
Because of its lack of flavor and fat, black cocoa is rarely used on its own. The professional approach is to use it as a natural colorant in combination with a high-quality regular Dutch-process cocoa. A common ratio is one part black cocoa to three parts Dutch-process cocoa. This blend provides the best of both worlds: the deep, rich flavor from the standard Dutch cocoa and the intense, dark color from the black cocoa, resulting in a finished product that is both visually dramatic and deliciously chocolatey.
The progression from natural to black cocoa is a clear illustration of the impact of processing on the final product.
| Processing Level | pH Range | Color | Flavor Impact |
|---|---|---|---|
| Natural | 5-6 | Light brown, reddish | Bright, acidic, fruity |
| Light Dutch | 6.5-7 | Medium brown | Balanced, mild |
| Regular Dutch | 7-7.5 | Dark brown | Smooth, mellow |
| Black Cocoa | 8+ | Jet black | Oreo-like, less chocolate flavor |
Why High-Quality Forastero Is Essential for Structured Ganaches?
While we’ve focused on the processing of cocoa, the raw ingredient itself—the cacao bean—plays an essential role. The vast majority of the world’s cocoa powder is made from Forastero beans. Unlike the more delicate and fruity Criollo or Trinitario varieties, Forastero is known for being robust, disease-resistant, and delivering a classic, full-bodied “chocolatey” flavor. This makes it the workhorse of the industry.
Its importance in baking, particularly for applications like ganache, lies in its high concentration of cocoa solids. Cocoa powder is essentially pure cocoa solids with most of the cocoa butter removed. As noted by baking experts, these solids are the primary delivery mechanism for flavor. A small amount of powder can contribute a more potent and sharper chocolate taste than a much larger amount of baking chocolate, which is diluted with extra sugar and fat. This flavor concentration is what makes Forastero-based cocoa powder so efficient.
In a ganache, which is an emulsion of chocolate and cream, cocoa powder plays a dual role. Adding a tablespoon of high-quality Forastero cocoa powder to a ganache recipe not only amplifies the chocolate flavor but also adds fine solids that help to thicken and stabilize the emulsion. This creates a ganache that is not only richer in taste but also has a better structure for spreading, piping, or glazing. The robust, non-acidic flavor profile of a Dutch-processed Forastero powder is ideal, as it won’t clash with the dairy in the cream and will provide a deep, foundational chocolate base.
How to Build a 3-Tier Chocolate Cake That Survives Transport?
Building a tiered cake is an engineering challenge as much as a baking one. When that cake is a rich chocolate sponge, the properties of cocoa powder become central to its structural integrity. A cake that is wonderfully moist and tender as a single layer can easily collapse under the weight of additional tiers. The key is to strategically manipulate the cake’s density based on the cocoa powder used.
As we discussed, high-fat cocoa powders can create a firmer texture due to cocoa butter crystallization. While this can be a drawback for a single-layer cake, it can be used to your advantage in a tiered structure. However, too much solid fat can make the cake brittle. The professional solution is a tiered approach to the recipe itself. For the largest, load-bearing bottom tier, use a lower-fat (10-12%) cocoa powder. This, combined with a slightly higher flour ratio, creates a sturdier, more resilient sponge that can support the weight above it without being dry. For the smaller, lighter top tiers, you can use a higher-fat cocoa to deliver a richer texture where structural demands are lower.
Transport adds another layer of complexity: temperature. The stability of your entire structure is vulnerable to heat. According to crucial temperature data, cocoa butter melts at 93-101°F (34-38°C). If a cake made with high-fat cocoa is transported in a warm car, the cocoa butter within the crumb will begin to soften, compromising the cake’s internal structure long before the frosting shows any sign of melting. This makes a strong case for using lower-fat cocoa in cakes that need to travel, ensuring the structure relies on the flour and egg network, not on temperature-sensitive fat.
Key Takeaways
- Cocoa’s pH (natural vs. Dutch) is the primary driver of leavening reactions and must be matched with the correct leavener (baking soda vs. powder).
- High-fat cocoa can lead to a drier, firmer crumb in some cakes because cocoa butter solidifies at room temperature, unlike oil.
- Blooming cocoa in hot liquid is a non-negotiable step to dissolve solids and release volatile flavor compounds for a more intense taste.
- Sponge density, achieved through ingredient ratios and mixing methods, is more critical for the structural integrity of a tiered cake than dowels alone.
Why Sponge Density Matters More Than Dowels for Stability?
Dowels and cake boards are essential tools for supporting a tiered cake, but they are only external supports. They transfer weight downwards, but they cannot prevent a weak, overly delicate sponge from compressing and buckling under its own load. The true foundation of a stable tiered cake is the internal structure of the sponge itself: its density and crumb structure. This internal network is created during the baking process through starch gelatinization.
When heated in the presence of liquid, the starches in both the flour and the cocoa powder absorb water, swell, and eventually set into a gel-like network that forms the cake’s crumb. The strength of this network is what determines the cake’s ability to bear weight. A recipe with a high ratio of sugar and liquid to flour can produce a very moist cake, but it may have a weak structure that is unsuitable for stacking. The sugar is crucial, as it binds to water molecules and helps to control their evaporation, but the starch network provides the scaffolding.
The mixing method also has a profound impact on density. A “reverse creaming” method, where the fat is first mixed with the dry ingredients (including cocoa powder) before adding liquids, minimizes gluten development. This creates a very fine, tight, and tender crumb that is surprisingly strong and highly resistant to compression. In contrast, a standard “creaming” method incorporates more air, resulting in a lighter, more open crumb that is less suitable for heavy loads. By selecting the right recipe and mixing method, you can engineer a sponge that is dense and strong enough to be structural, yet remains perfectly moist and tender.
By moving beyond simple recipes and embracing the science of your ingredients, you gain the power to not only follow instructions but to innovate. Understanding the chemical properties of cocoa powder transforms you from a cook into a true baking expert, capable of creating cakes that are consistently, reliably, and scientifically perfect. Now, apply these principles to your next creation and control the outcome with confidence.