In summary:
- The key to velvet truffles is controlling ganache emulsion and cocoa butter crystallization, not just the ingredients.
- Prevent melting during rolling by keeping your hands and the environment consistently cold, using specific, gentle techniques.
- A split, oily ganache is caused by an imbalanced fat-to-water ratio or incorrect temperatures, but it can often be saved.
- Your mise en place is critical; chocolate work is a science that forgives no delays.
There’s a special magic in offering a box of homemade chocolate truffles during the festive season. It’s a gift that speaks of time, care, and a personal touch that store-bought confections can rarely match. Many aspiring home cooks embark on this journey, dreaming of creating those perfectly round, smooth, melt-in-your-mouth delights. Yet, the path is often paved with frustration: ganache that splits into a greasy mess, truffles that melt into puddles in your hands, or a final texture that’s disappointingly grainy rather than velvety.
Most guides will tell you to simply “use good quality chocolate” or “chill the mixture.” While true, these tips barely scratch the surface. They are the “what” without the “why.” They don’t explain the delicate dance of fat and water that forms a perfect ganache, nor the precise temperature control needed to coax cocoa butter into its most stable, glossy form. This lack of understanding is what separates an amateur attempt from an artisanal result. We’ve all been there, wondering where we went wrong.
But what if the secret wasn’t just in the recipe, but in the technique? What if achieving that coveted “velvet” texture was less about magic and more about mastering the physics of chocolate? This guide is your invitation into the pastry chef’s lab. We will move beyond the platitudes and explore the core principles: understanding emulsion, managing temperature with scientific precision, and mastering a preparation workflow that sets you up for success every single time. It’s time to learn not just how to follow instructions, but how to think like a chocolatier.
To guide you from frustrated cook to confident confectioner, this article breaks down every critical stage. We will explore the art of rolling, the science of coatings, and the secrets to a stable, luscious ganache, ensuring your homemade truffles are the highlight of any celebration.
Summary: Mastering the Art and Science of Homemade Truffles
- Why Are Truffles the Ultimate Symbol of Festive Generosity?
- How to Roll Round Truffles Without Melting Them in Your Hands?
- Cocoa Powder vs. Crushed Nuts: Which Coating Preserves Moisture Better?
- The Temperature Mistake That Turns Truffles into Puddles
- When to Start Making Truffles for Christmas to Ensure Freshness?
- Why Does Your Dark Chocolate Ganache Split and Look Oily?
- Is Making Your Own Chocolate Actually Cheaper Than Buying It?
- Why Mise-en-Place Is More Critical for Chocolate Than Pastry?
Why Are Truffles the Ultimate Symbol of Festive Generosity?
A homemade chocolate truffle is more than just a sweet treat; it is an act of generosity transformed into a bite-sized indulgence. In a world of mass-produced goods, the time and skill invested in crafting something by hand carries immense emotional weight. This is precisely why truffles have become synonymous with festive gifting and personal affection. They represent a luxury that is both accessible to make and deeply appreciated to receive, elevating them beyond a simple candy to a token of high esteem. The global market reflects this, with projections showing the truffle chocolate market was valued at more than $1.38 billion in 2024 and is expected to continue its strong growth.
The value isn’t just monetary; it’s symbolic. According to the National Confectioners Association, a staggering 92% of Americans prefer receiving chocolates or candies as gifts, with sales peaking during Christmas. Within this category, premium handmade truffles hold a special place. They signal to the recipient that the giver invested not just money in ingredients, but their personal time and effort to create something unique. This personal investment is the true measure of their generosity. The very act of making them—the careful melting, the patient chilling, the delicate rolling—infuses each truffle with a story and an intention that a machine-made product can never replicate.
Ultimately, gifting homemade truffles is a powerful non-verbal communication. It says, “I took the time to learn a skill and create something beautiful specifically for you.” This gesture of dedication and care is what makes them the ultimate symbol of festive generosity, turning a simple box of chocolates into a cherished memory.
How to Roll Round Truffles Without Melting Them in Your Hands?
This is the moment of truth for many amateur chocolatiers: transforming a chilled slab of ganache into perfect spheres. It’s also where things often go wrong. The frustration is real—the ganache begins to soften, stick, and lose its shape, leaving you with misshapen lumps instead of elegant orbs. The enemy here is simple: heat transfer. Your hands, even if they feel cool, are significantly warmer than the ideal temperature for chocolate. The key to success is not just to “work quickly,” but to actively manage the temperature of your hands and your workspace.
Professional pastry chefs have developed specific techniques to combat this. The goal is to minimize contact time and reduce the temperature differential between your hands and the ganache. One of the most effective methods is the “three-finger technique,” where you use only your fingertips to gently roll the truffle, dramatically reducing the amount of heat transferred from your warmer palms. Before you even begin, ensure your ganache is thoroughly chilled—not frozen, but firm to the touch. This gives you a longer working window before it starts to soften.
As you can see in the technique above, precision and minimal contact are paramount. To maintain this advantage throughout the process, you must create a cold-work environment. This involves more than just a chilled room. Below is a checklist of professional secrets to keep your truffles from melting during the crucial rolling stage.
Your Action Plan: The No-Melt Rolling Method
- Pre-Chill Your Hands: Before starting and between batches, run your hands under cold water for 30 seconds and dry them thoroughly. For extra effect, hold an ice pack wrapped in a tea towel.
- Scoop First, Roll Later: Use a small spoon or melon baller to scoop all your truffle portions onto a parchment-lined tray first. Let them rest for 30 minutes in the fridge to firm up again before you begin rolling.
- Master the Three-Finger Technique: Place a truffle portion between the fingertips of both hands. Use light, circular motions, keeping the truffle away from your palms. The goal is to shape, not to warm.
- Work in Small, Fast Batches: Roll only 5-6 truffles at a time, then return them to the refrigerator to chill while you wash and re-cool your hands. This prevents the entire batch from warming up.
- Create a Cool Workspace: If possible, work on a cool surface like marble or granite. Avoid rolling truffles near a warm oven or in direct sunlight.
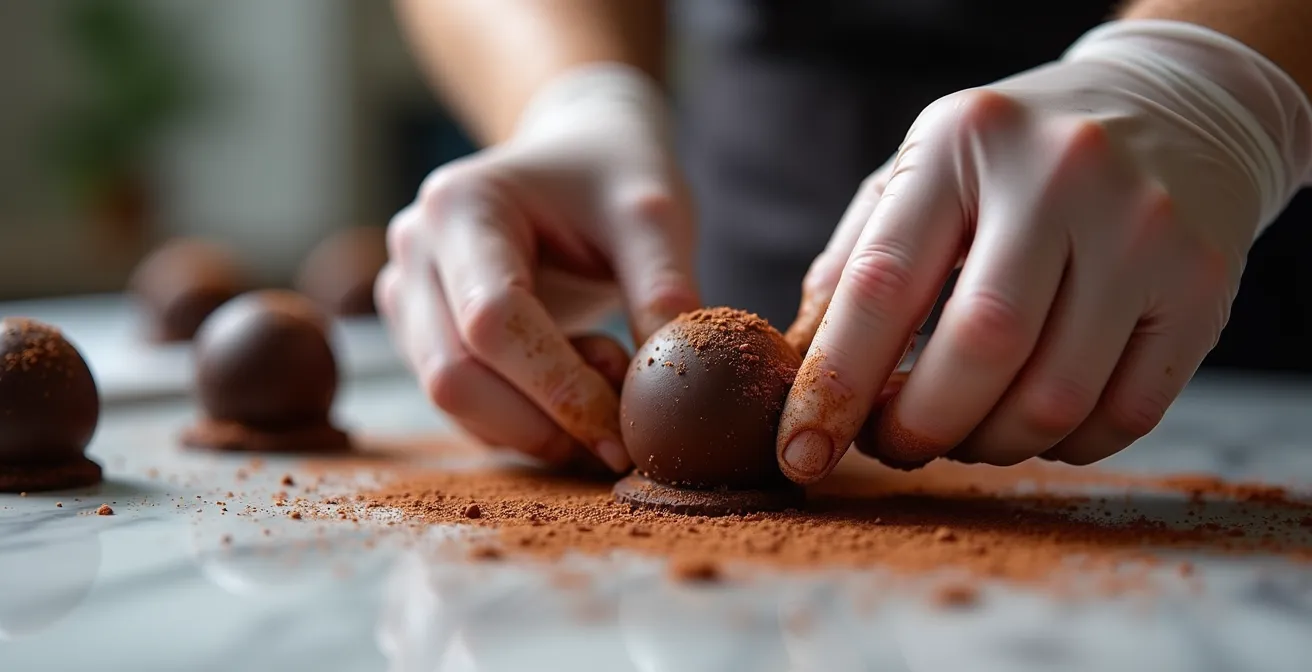
Cocoa Powder vs. Crushed Nuts: Which Coating Preserves Moisture Better?
The coating on a truffle does more than add flavor and texture; it acts as a crucial moisture barrier, protecting the delicate ganache inside. The choice of coating has a significant impact on both the taste and the shelf life of your creations. While classic cocoa powder is a popular choice for its bittersweet flavor, it is also hygroscopic, meaning it naturally draws moisture out of the ganache over time. This can lead to a drier, crumblier texture if the truffles are not consumed quickly.
On the other hand, coatings rich in fat, like finely crushed nuts or tempered chocolate, create a much more effective seal. The natural oils in nuts form a lipid barrier that helps lock in moisture, keeping the ganache creamy for longer. A perfectly tempered chocolate shell is the ultimate form of preservation, creating an almost impermeable seal that gives the truffle a satisfying snap and the longest possible shelf life. Powdered sugar, much like cocoa, is highly hygroscopic and should only be used for truffles intended for immediate consumption.
To truly understand the impact of your choice, consider how different coatings perform over a week. Pastry chefs often use a comparison like the one below to decide on a coating based on when the truffles will be served.
| Coating Type | Day 1 Moisture | Day 3 Moisture | Day 7 Moisture | Barrier Properties |
|---|---|---|---|---|
| Plain Cocoa Powder | 95% | 85% | 70% | Hygroscopic – draws moisture out |
| Stabilized Cocoa (with oil) | 98% | 94% | 88% | Lipid barrier prevents moisture loss |
| Crushed Nuts | 97% | 92% | 86% | Natural oils create sealant |
| Tempered Chocolate | 99% | 97% | 94% | Complete moisture seal |
| Powdered Sugar | 93% | 80% | 65% | Highly hygroscopic |
This data clearly shows that for gifts you are making in advance, a coating of crushed nuts or tempered chocolate is far superior for maintaining that luscious, velvety interior. If your truffles are for a party tonight, the classic appeal of cocoa powder is perfectly fine. The choice is a balance between flavor profile and preservation needs.
The Temperature Mistake That Turns Truffles into Puddles
The single most critical factor in achieving a perfect truffle texture is temperature. It’s not just about chilling the ganache; it’s about understanding and controlling the crystallization of cocoa butter at a microscopic level. When chocolate sets, the fat (cocoa butter) forms crystals. There are six types of crystals, but only one—Form V—gives chocolate its desirable snap, glossy finish, and melt-in-your-mouth quality. All the other crystal forms are unstable, leading to a dull, soft, or grainy texture.
This is where many homemade truffles fail. Simply melting and cooling chocolate without precise temperature control results in a chaotic mix of unstable crystals. The truffle might feel firm when cold, but it will lack structural integrity at room temperature, quickly becoming soft or even puddle-like. The “magic” of tempering is simply the process of encouraging the formation of those coveted Form V crystals. Research from Nature Communications shows that these Form V crystals form at 31-32°C and melt at 34.3°C, which is just below human body temperature, explaining why well-tempered chocolate melts so beautifully in your mouth.
Ignoring these precise temperature targets is the mistake that leads to disaster. For a dark chocolate ganache, if the mixture is too hot when you combine the chocolate and cream, the emulsion will break. If it cools too quickly or without agitation, you get unstable crystals. A digital thermometer is not a “nice to have” for chocolate work; it is an essential tool. Mastering temperature control is the leap from simply mixing ingredients to truly crafting a high-quality confection. It’s the difference between a truffle that holds its shape proudly and one that slumps in defeat.
When to Start Making Truffles for Christmas to Ensure Freshness?
When you’re preparing homemade truffles as a Christmas gift, timing is everything. You want them to be at their absolute peak of freshness and flavor when you hand them over. Making them too early can result in a dry ganache or stale-tasting coatings, while leaving it to the last minute adds unnecessary holiday stress. The ideal timeline depends on the type of ganache and coating you use, as some ingredients act as natural preservatives.
A ganache made with alcohol, for instance, can be prepared further in advance because alcohol inhibits microbial growth. A pure cream-and-chocolate ganache has a shorter shelf life and should be made closer to your gifting date. The coating also plays a major role; as we’ve discussed, a tempered chocolate shell provides the best protection and extends freshness. A timeline will help you plan your production schedule without compromising on quality, ensuring your gifts are as delicious as they are beautiful.
Here is a professional-style production timeline to help you plan your truffle-making for the holidays:
- Two Weeks Before (Day -14): This is the time to make any ganache bases that are stabilized with alcohol. The alcohol acts as a preservative, giving you a head start.
- One Week Before (Day -7 to -5): Prepare any pure cream-and-chocolate ganache. This ensures the ganache is fresh and has optimal flavor when served.
- Three Days Before (Day -3): Roll and shape all your truffle centers. Store them in an airtight container in the refrigerator to keep them firm and ready for coating.
- Two Days Before (Day -2): Apply your chosen coatings. Whether it’s a simple roll in cocoa powder, a coating of crushed nuts, or a delicate shell of tempered chocolate, this is the day to do it.
- One Day Before (Day -1): Perform a final quality check and package your truffles in their gift boxes. This prevents any last-minute rush.
- Gifting Day (Day 0): For the best flavor experience, advise the recipient to let the truffles sit at room temperature for about 20 minutes before enjoying.
By following this schedule, you can manage your time effectively and be confident that your handcrafted gifts are delivered in perfect condition, representing the very best of your efforts.
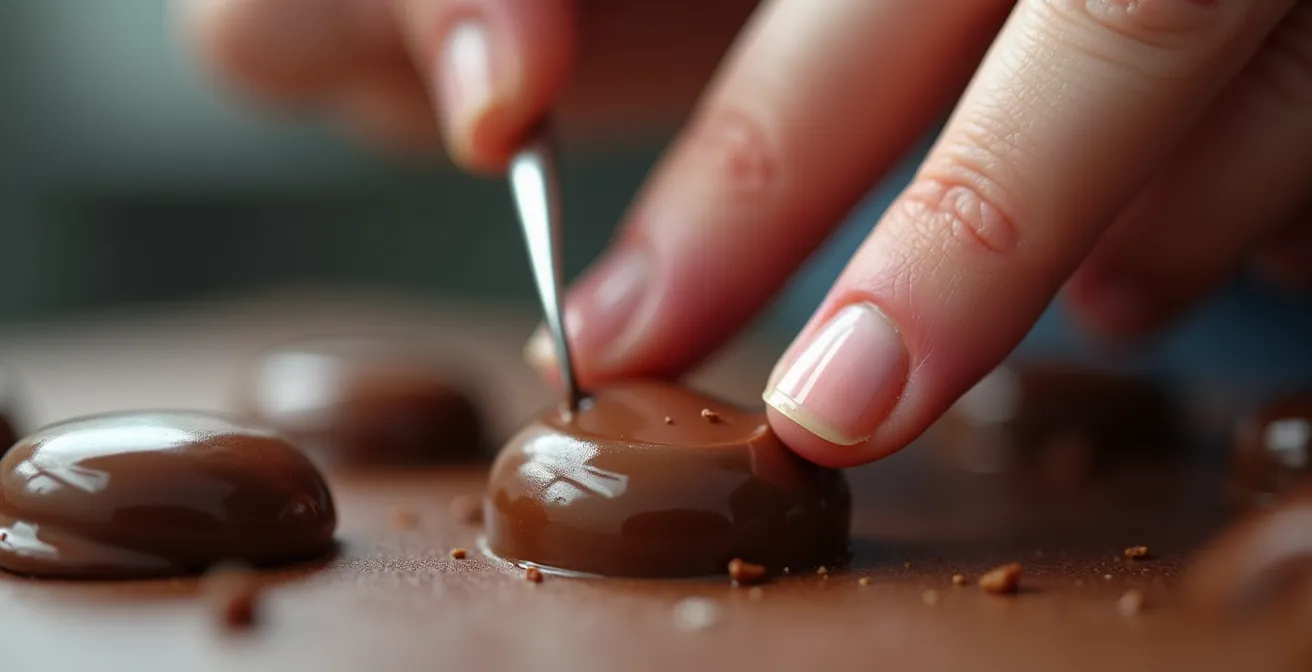
Why Does Your Dark Chocolate Ganache Split and Look Oily?
It’s the most heartbreaking moment in truffle making: you pour warm cream over beautiful dark chocolate, begin to stir, and instead of a silky, uniform river of ganache, you get a grainy, oily mess. This is a “broken” or “split” ganache, and it happens when the emulsion of fat (from the cocoa butter) and water (from the cream) fails to form or breaks apart. Understanding why this happens is the key to preventing it.
A ganache is a delicate balancing act. Splitting is primarily caused by two things: an incorrect ratio of fat to water, or temperature shock. Dark chocolate has a much higher percentage of cocoa solids (and thus, fat) than milk or white chocolate. If there isn’t enough water from the cream to hold all that fat in suspension, the fat will separate, creating that dreaded oily sheen. This is why a simple “2:1 ratio” is a misleading platitude. The correct ratio depends entirely on the cocoa percentage of your chocolate.
As a rule of thumb, the higher the cocoa percentage, the more cream you will need to maintain a stable emulsion. Here is a guide that professional chocolatiers use to determine their starting ratios:
| Cocoa % | Chocolate:Cream Ratio (by weight) | Texture Result | Risk of Splitting |
|---|---|---|---|
| 50-60% | 2:1 | Soft, creamy | Low |
| 60-70% | 2.5:1 | Firm, smooth | Medium |
| 70-80% | 3:1 | Very firm | High if ratio incorrect |
| 80%+ | 3.5:1 | Hard, intense | Very high |
But don’t despair if your ganache does split! It can often be saved. The trick is to re-introduce a small amount of liquid to help the emulsion reform. Gently warm the ganache over a double boiler (do not let it get too hot) and then, off the heat, vigorously stir in a tablespoon of cold cream, starting from the center and working your way out. Often, this is enough to bring the mixture back to a smooth, homogenous state.
Is Making Your Own Chocolate Actually Cheaper Than Buying It?
When considering whether to make your own truffles for gifting, the question of cost inevitably arises. Is it genuinely more economical to go through the effort of buying ingredients and spending hours in the kitchen versus picking up a box of premium chocolates? The answer is nuanced and depends on what you value: pure cost savings, quality of ingredients, or the intangible value of a handmade gift.
If you compare the cost of ingredients for a batch of homemade truffles to a high-end commercial brand like Godiva or a local artisanal chocolatier, making them yourself is almost always cheaper on a per-truffle basis. The primary expenses are good-quality chocolate and heavy cream. However, this calculation doesn’t factor in your time. If you value your time, the hours spent on preparation, chilling, rolling, and coating can make the “cost” of homemade truffles much higher.
The real advantage of making your own lies in quality control and customization. You get to choose the exact percentage of dark chocolate, the freshness of the cream, and you can create unique flavor infusions that are impossible to find in a store. Furthermore, when making multiple batches for several gifts, the cost per batch decreases as you buy ingredients in larger quantities. Here’s a look at how the costs break down:
| Option | Estimated Cost per 20 Truffles | Quality Level | Time Investment |
|---|---|---|---|
| Homemade (Premium Chocolate) | $15-20 | Artisanal | 3-4 hours |
| Godiva/Lindt | $35-45 | Premium Commercial | 0 hours |
| Local Chocolatier | $50-70 | Artisanal | 0 hours |
| Homemade (3-4 batches) | $12 per batch | Artisanal | 5-6 hours total |
Ultimately, making truffles is not purely a cost-saving measure. It’s a choice to invest your time to create a higher-quality, more personal product. The financial savings are a bonus, but the true return on investment is the joy and appreciation of the person receiving a gift made with such care.
Key Takeaways
- The perfect truffle texture comes from scientific control over temperature and emulsion, not just good ingredients.
- A stable ganache depends on the correct chocolate-to-cream ratio, which changes based on the chocolate’s cocoa percentage.
- The coating is not just for flavor; it’s a functional moisture barrier that dictates the truffle’s shelf life.
Why Mise-en-Place Is More Critical for Chocolate Than Pastry?
In any kitchen, *mise en place*—the French term for having all your ingredients prepped and your equipment organized—is a cornerstone of efficiency. But when working with chocolate, it transcends mere organization and becomes a non-negotiable scientific protocol. While a pastry chef making a cake can pause to find a missing ingredient with little consequence, a chocolatier has no such luxury. Chocolate is unforgiving. Its state is dictated by time and temperature in a way that most other culinary mediums are not.
The process of tempering, essential for the snap and shine of a truffle’s coating, is a race against the clock. As the experts at the Crystal Growth & Design Journal note, the entire process is a delicate dance. Any hesitation can be fatal to the final product. As they state in their analysis of chocolate tempering:
Chocolate tempering is a multiscale phenomenon where the control of structure at multiple length scales needs to be considered. Any hesitation or delay can cause the temperature to drop incorrectly, ruining the final texture in a way that can’t be fixed.
– Crystal Growth & Design Journal, ACS Publications – Chocolate Tempering Perspective
This means that when you begin the tempering process, you cannot stop to chop more chocolate, search for a spatula, or calibrate your thermometer. By the time you return, the chocolate will have cooled past its critical temperature window, and the crystal structure will be ruined. For chocolate, mise en place is a workflow requirement, not just a best practice. It ensures that you can execute a series of time-sensitive, temperature-dependent steps without interruption, giving you the control needed to achieve a perfect result.
Checklist: The Chocolatier’s Mise-en-Place
- Calibrate and Ready Thermometer: Your digital thermometer must be calibrated and within arm’s reach. Precision to 31-32°C is not optional.
- Prepare All Ingredients: All chocolate must be pre-chopped into uniform pieces for even melting. All other ingredients should be measured and ready.
- Set Up Your Station: Your double boiler should be pre-heated, and all bowls and spatulas must be perfectly clean and dry. Any drop of water can cause chocolate to seize.
- Position Trays and Tools: Have your parchment-lined trays ready to receive the finished truffles. Keep all necessary tools (spatulas, dipping forks) organized and accessible.
- Clear the Workspace: Ensure your entire work area is cleared of any potential contaminants, especially sources of moisture or steam.
By embracing these principles of science and preparation, you are no longer just a home cook following a recipe; you are an artisan in control of your craft. Now is the time to put this knowledge into practice. Embrace the process, and start creating your own batches of unforgettable, velvety truffles today—the perfect gift is truly within your reach.
Frequently Asked Questions on Homemade Truffles
How long can chocolate truffles be stored in the refrigerator?
Properly stored chocolate truffles can last up to 2 weeks in an airtight container in the refrigerator, though they taste best within the first week.
Can chocolate truffles be frozen for longer storage?
Yes, truffles can be frozen for up to 3 months in a freezer-safe container. Thaw overnight in the refrigerator, not at room temperature, to prevent condensation damage.